Load an Image
This quick guide will show you how to add an image to Trakk and associate it with multiple assets.
STEP 1 - Identify assets in your image
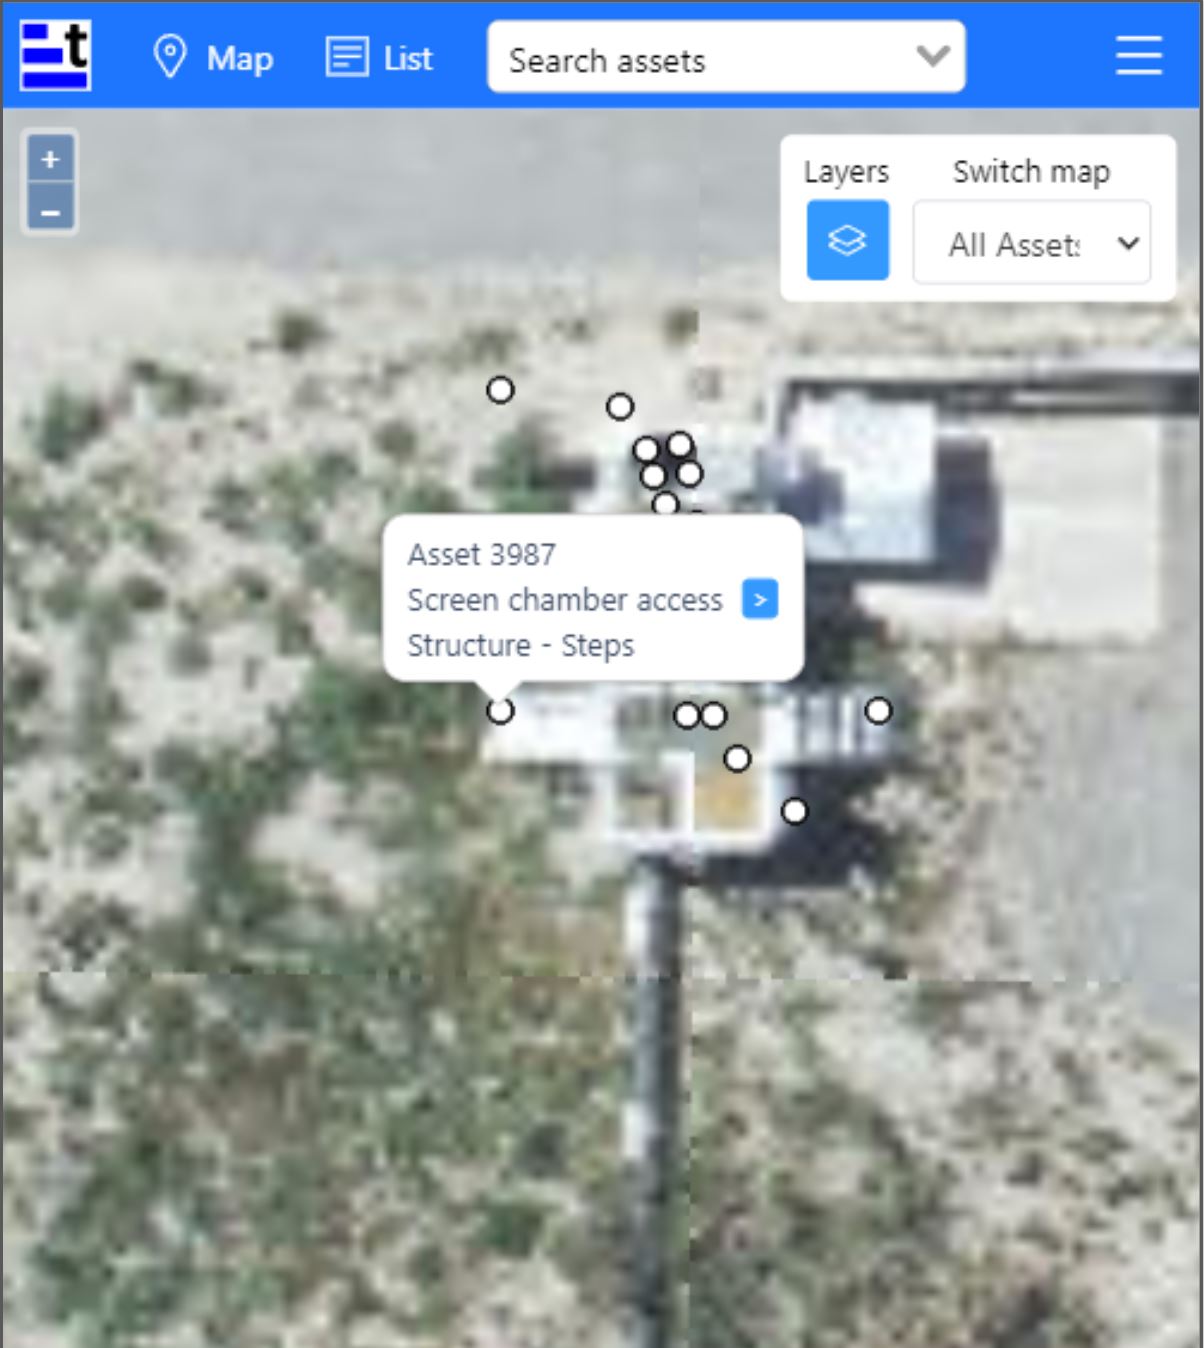
- Identify which assets are in the image you want to upload
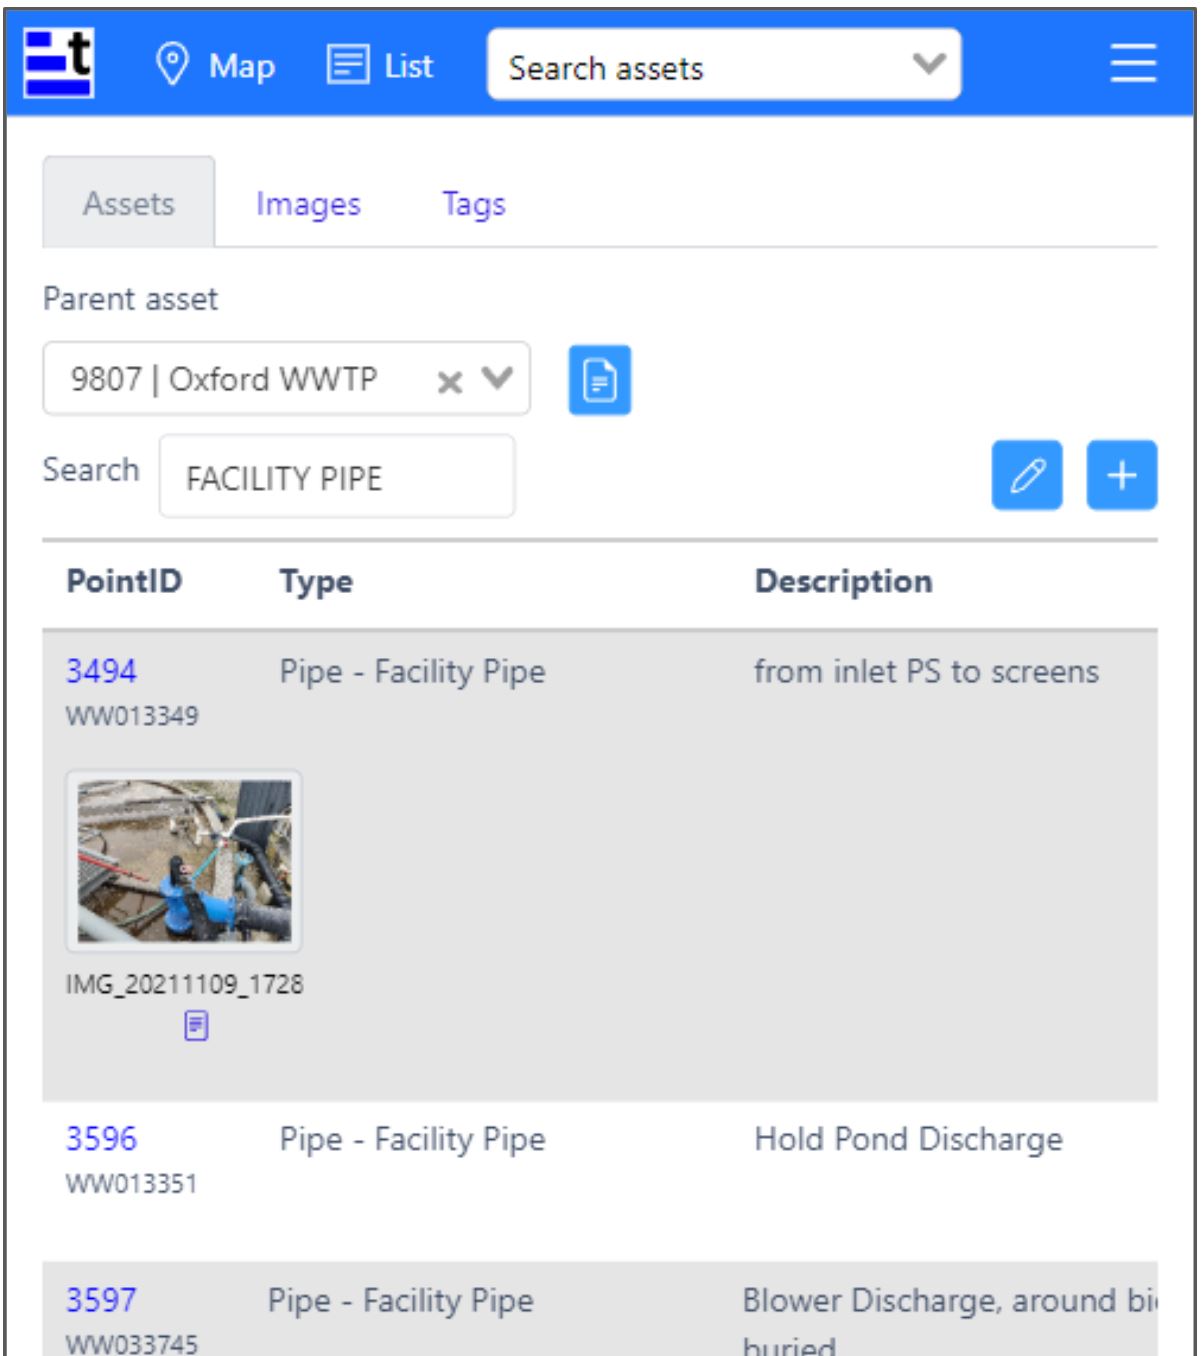
- Use List, Search, or Map views to find Point IDs for the assets you want to add an image to
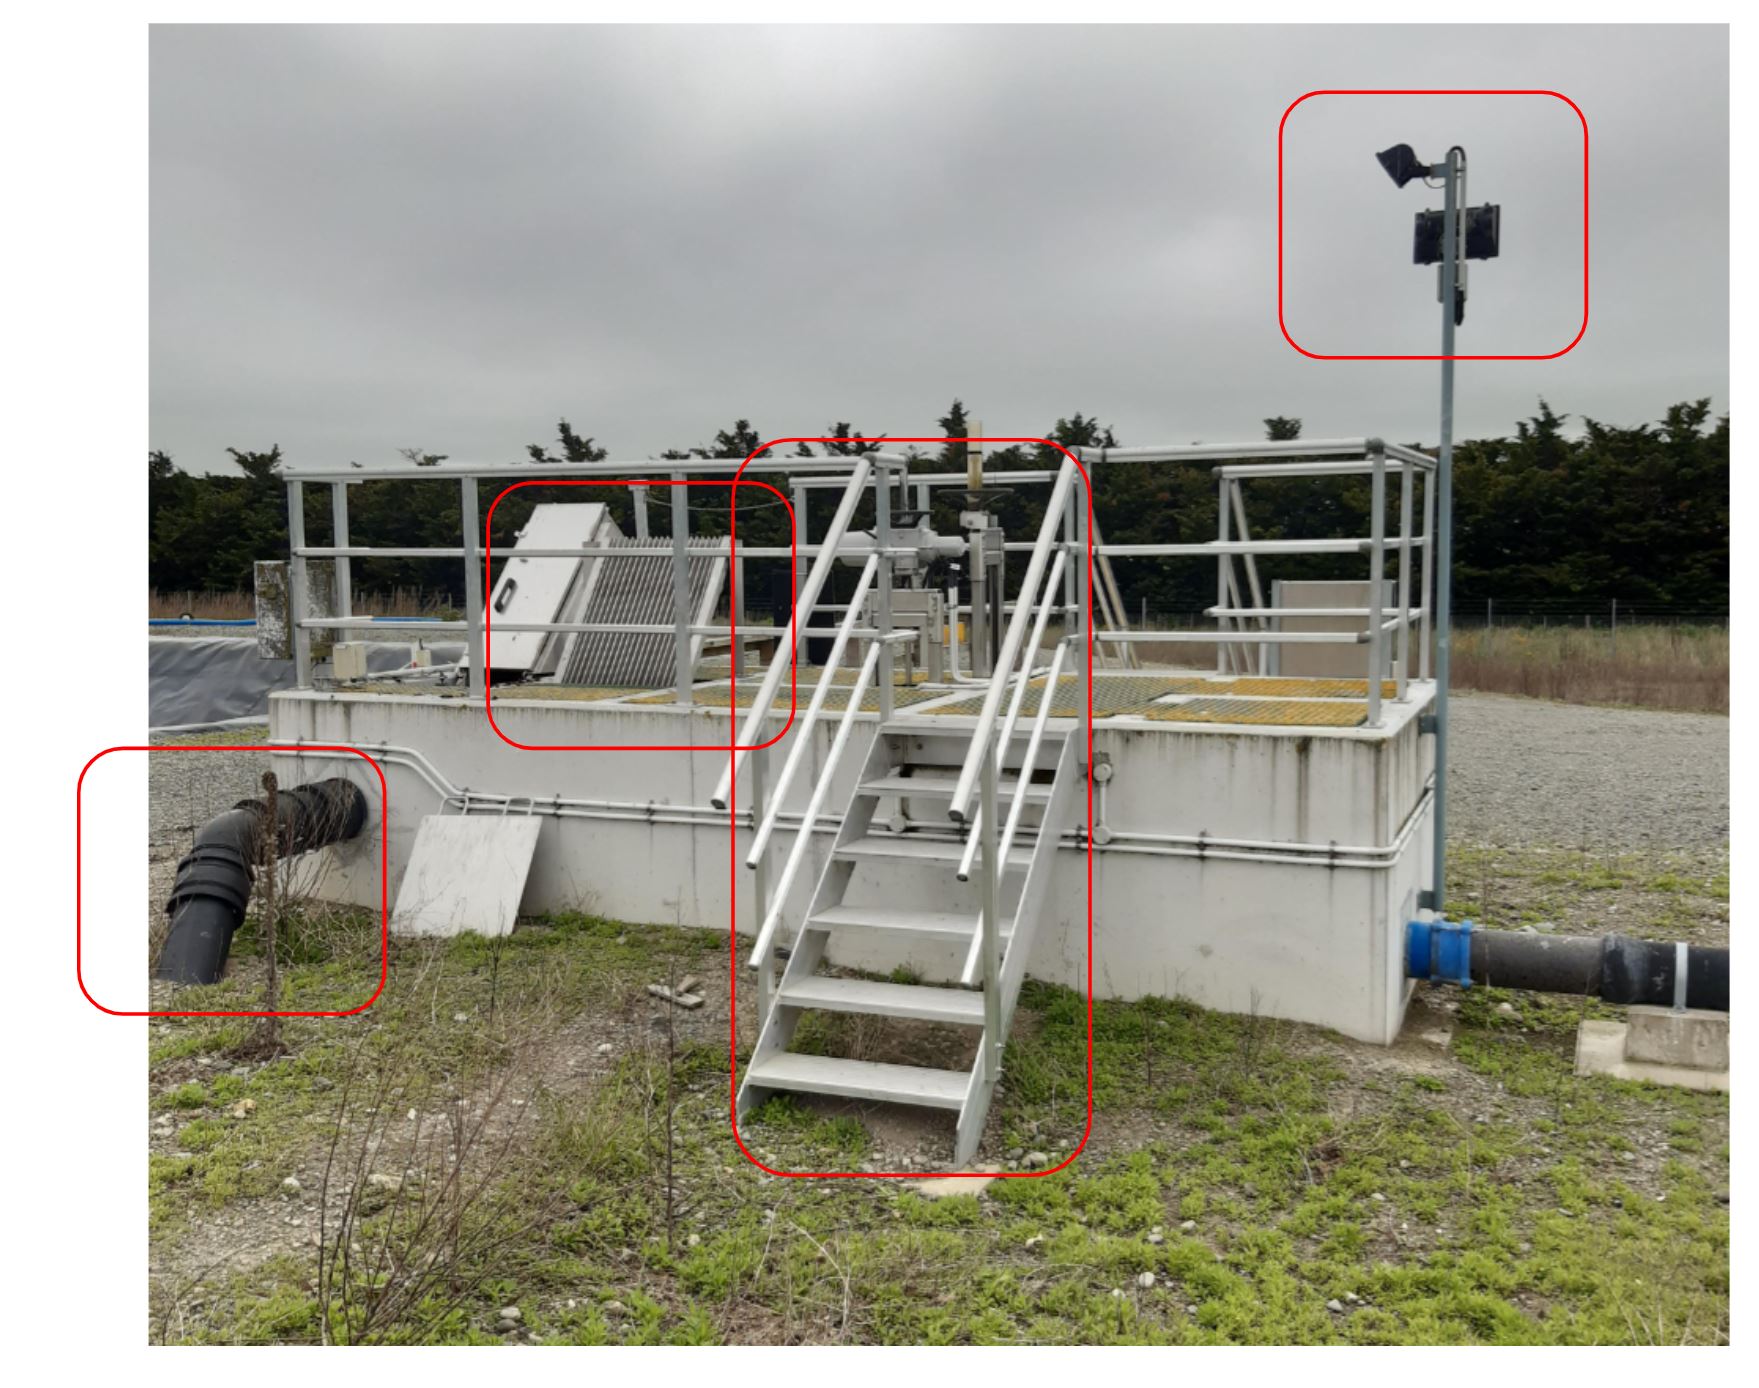
In this image we can see:
- Facility Pipe (3494)
- Stairs (3987)
- Lighting (3984)
- Static screen (12319)
STEP 2 - Open asset information
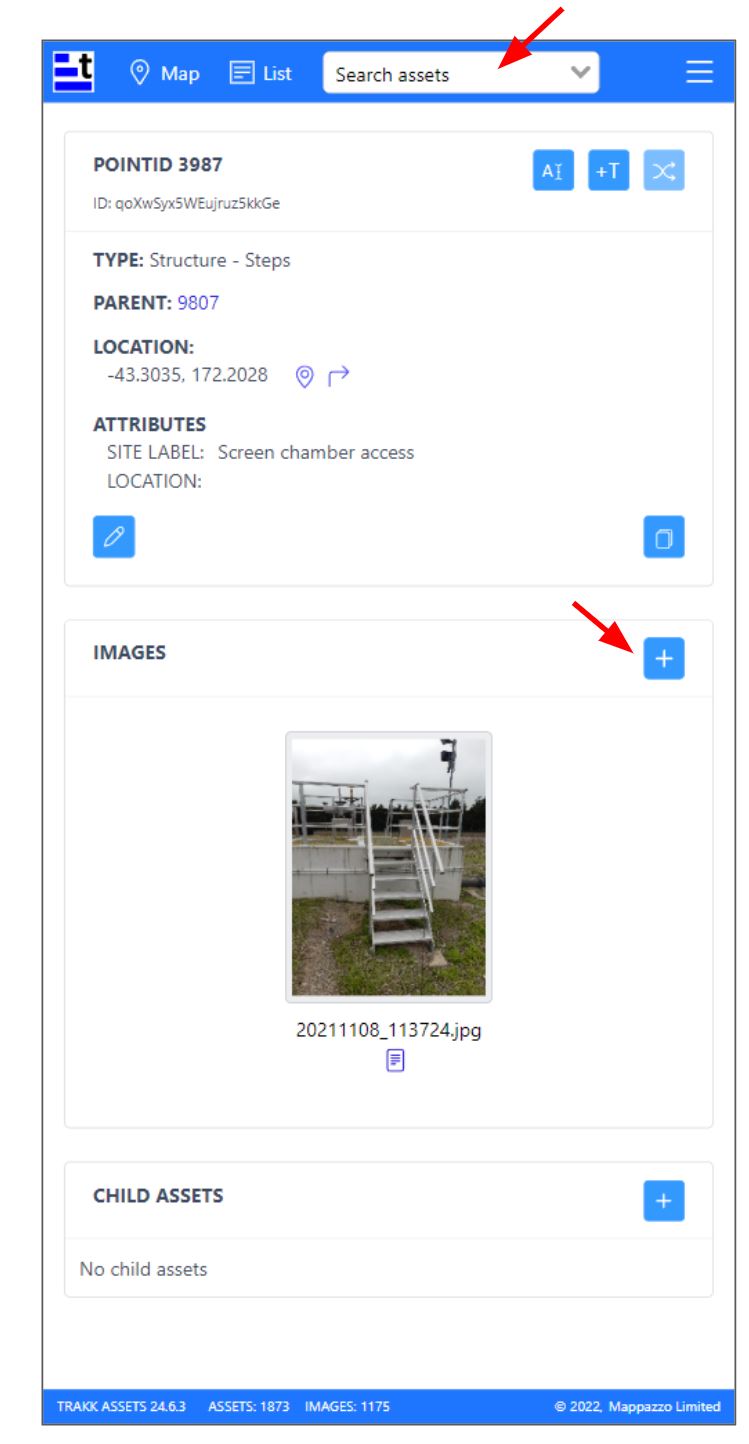
Open one of the assets in your list using the Search dropdown box.
Click the add button in the images list, above the image thumbnails. 
STEP 3 - Enter image information
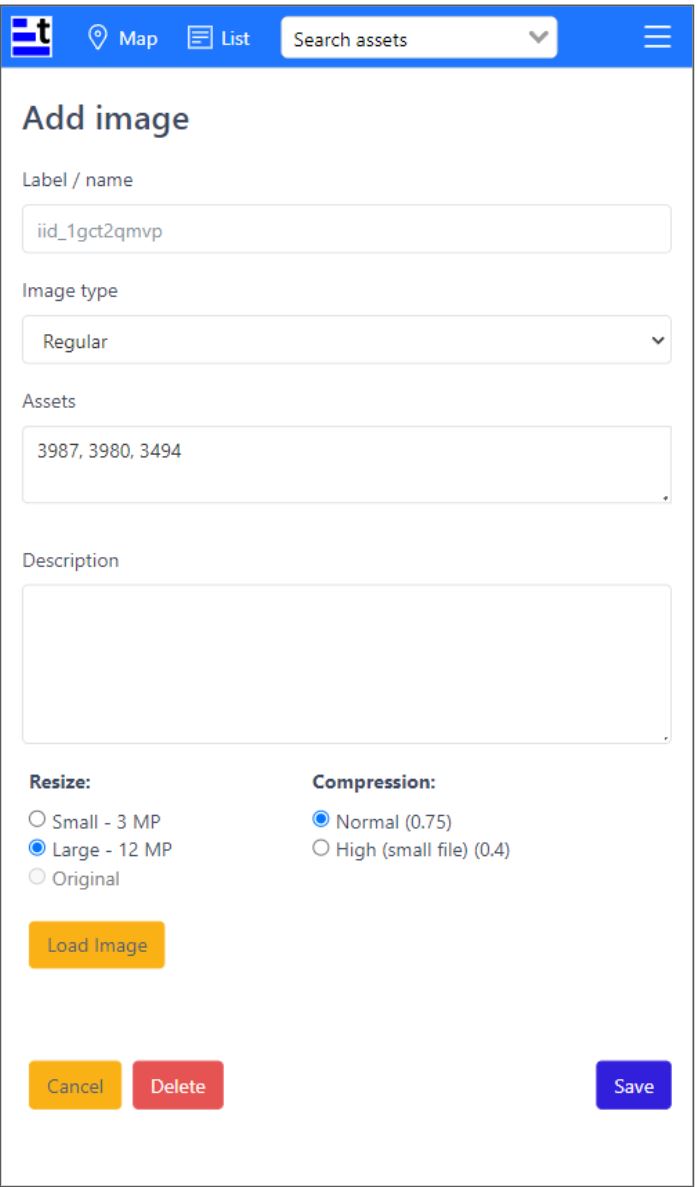
- (Optional) Enter a Label / Name, which is a short identification label used in links, thumbnails and search
- Choose image type - “Regular” or “360 Panorama” depending on the type of image you have (1)
- Enter the list of assets (Point IDs) to be linked to this image
- (Optional) Enter a Description, which is a long description of the image contents for operational use.
- Choose the quality options for image resize and JPG compression (2)
- Click Load Image button

NOTES:
(1) It is important to select “360 Panorama” type before upload, to prevent image resize.
(2) Default image options are preselected, some options may be unavailable and/or hidden by your team administrator.
STEP 4 - Load image
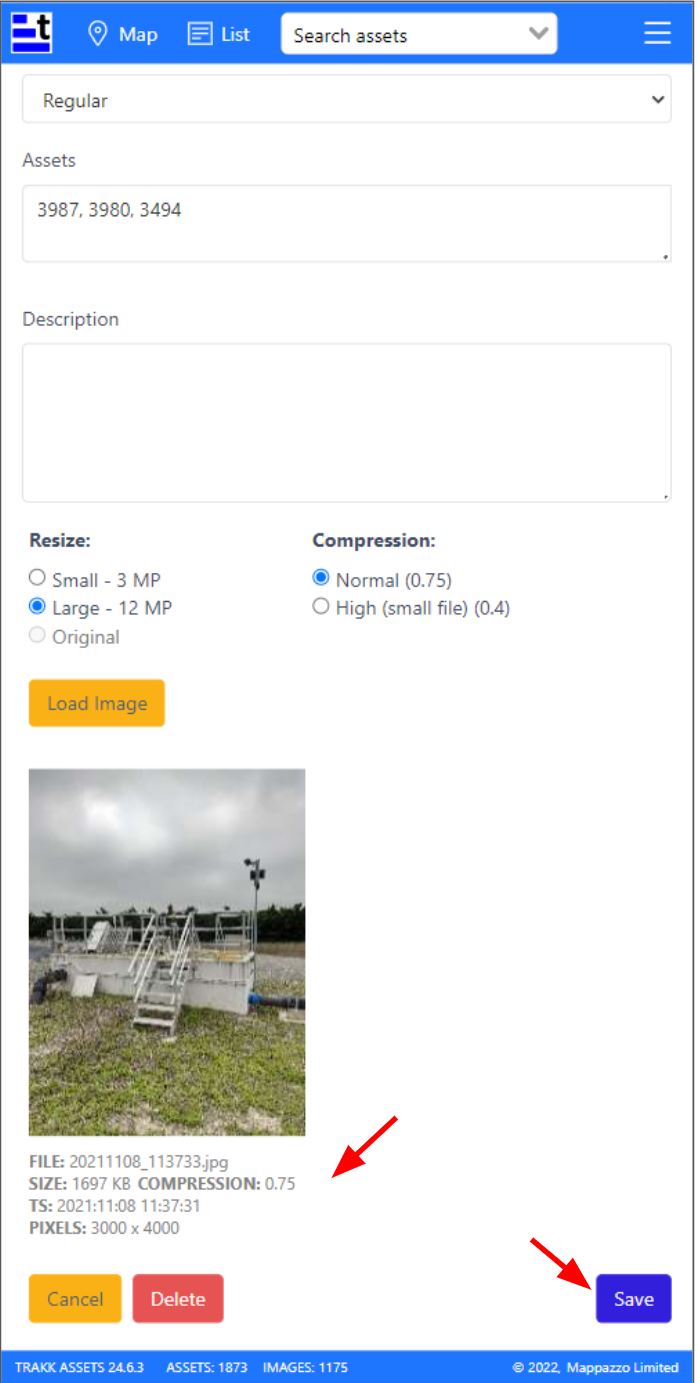
- Use file picker or phone camera to select the image you want to upload
- After analysing your image, Trakk will display a thumbnail and information (metadata) about your image
- Once you are happy with the details and file preview, click “Save” to start upload.

STEP 5 - Confirm upload and check details
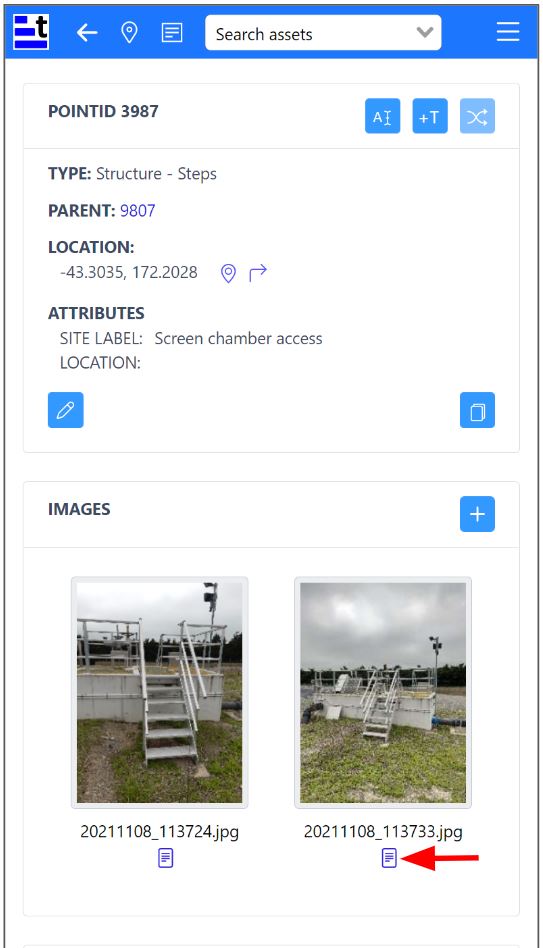
- The thumbnail will appear in asset view after successful upload
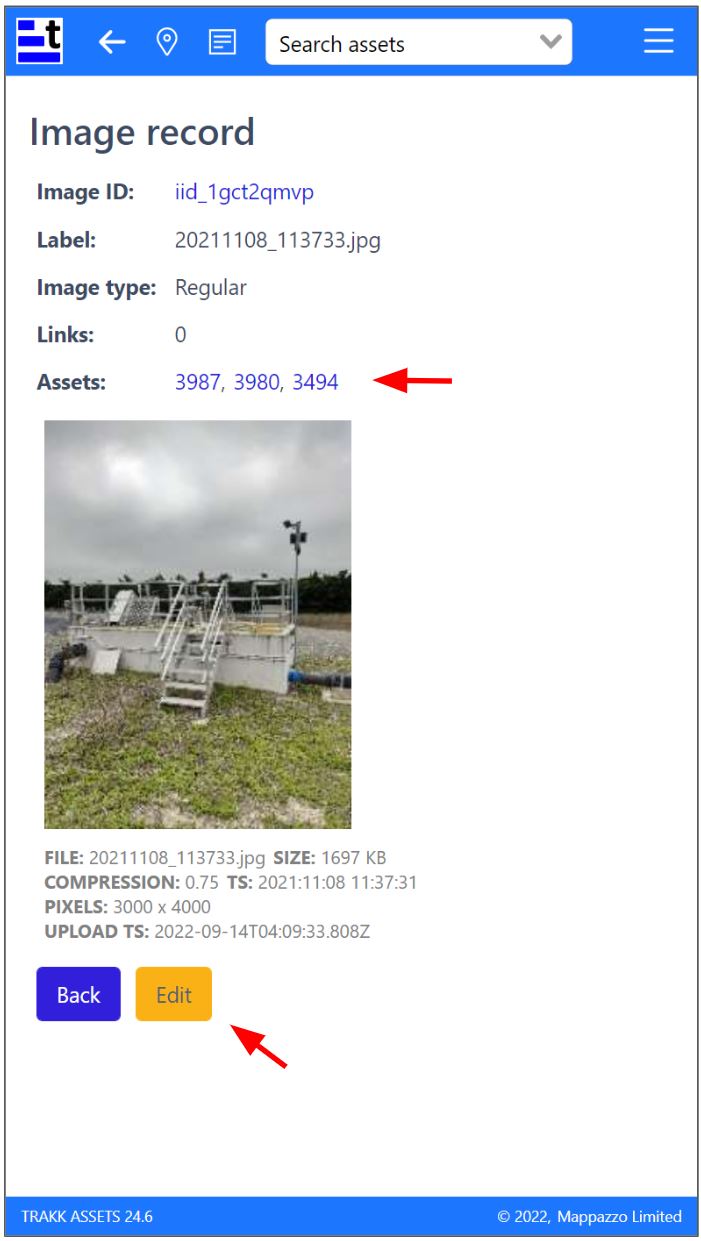
- Click the document icon to open the image record

- Use asset links to check that the correct assets have been specified
- Click edit button to change image details and to add or remove assets
