Make Reports
This quick guide will show you how to use the reporting tools for an asset.
STEP 1 - Select the asset
Find the asset you want to report on, using the map, list, or search tool, and open the asset information page.
For a detailed guide on how to find an asset, see "Find An Asset".
STEP 2 - View reports
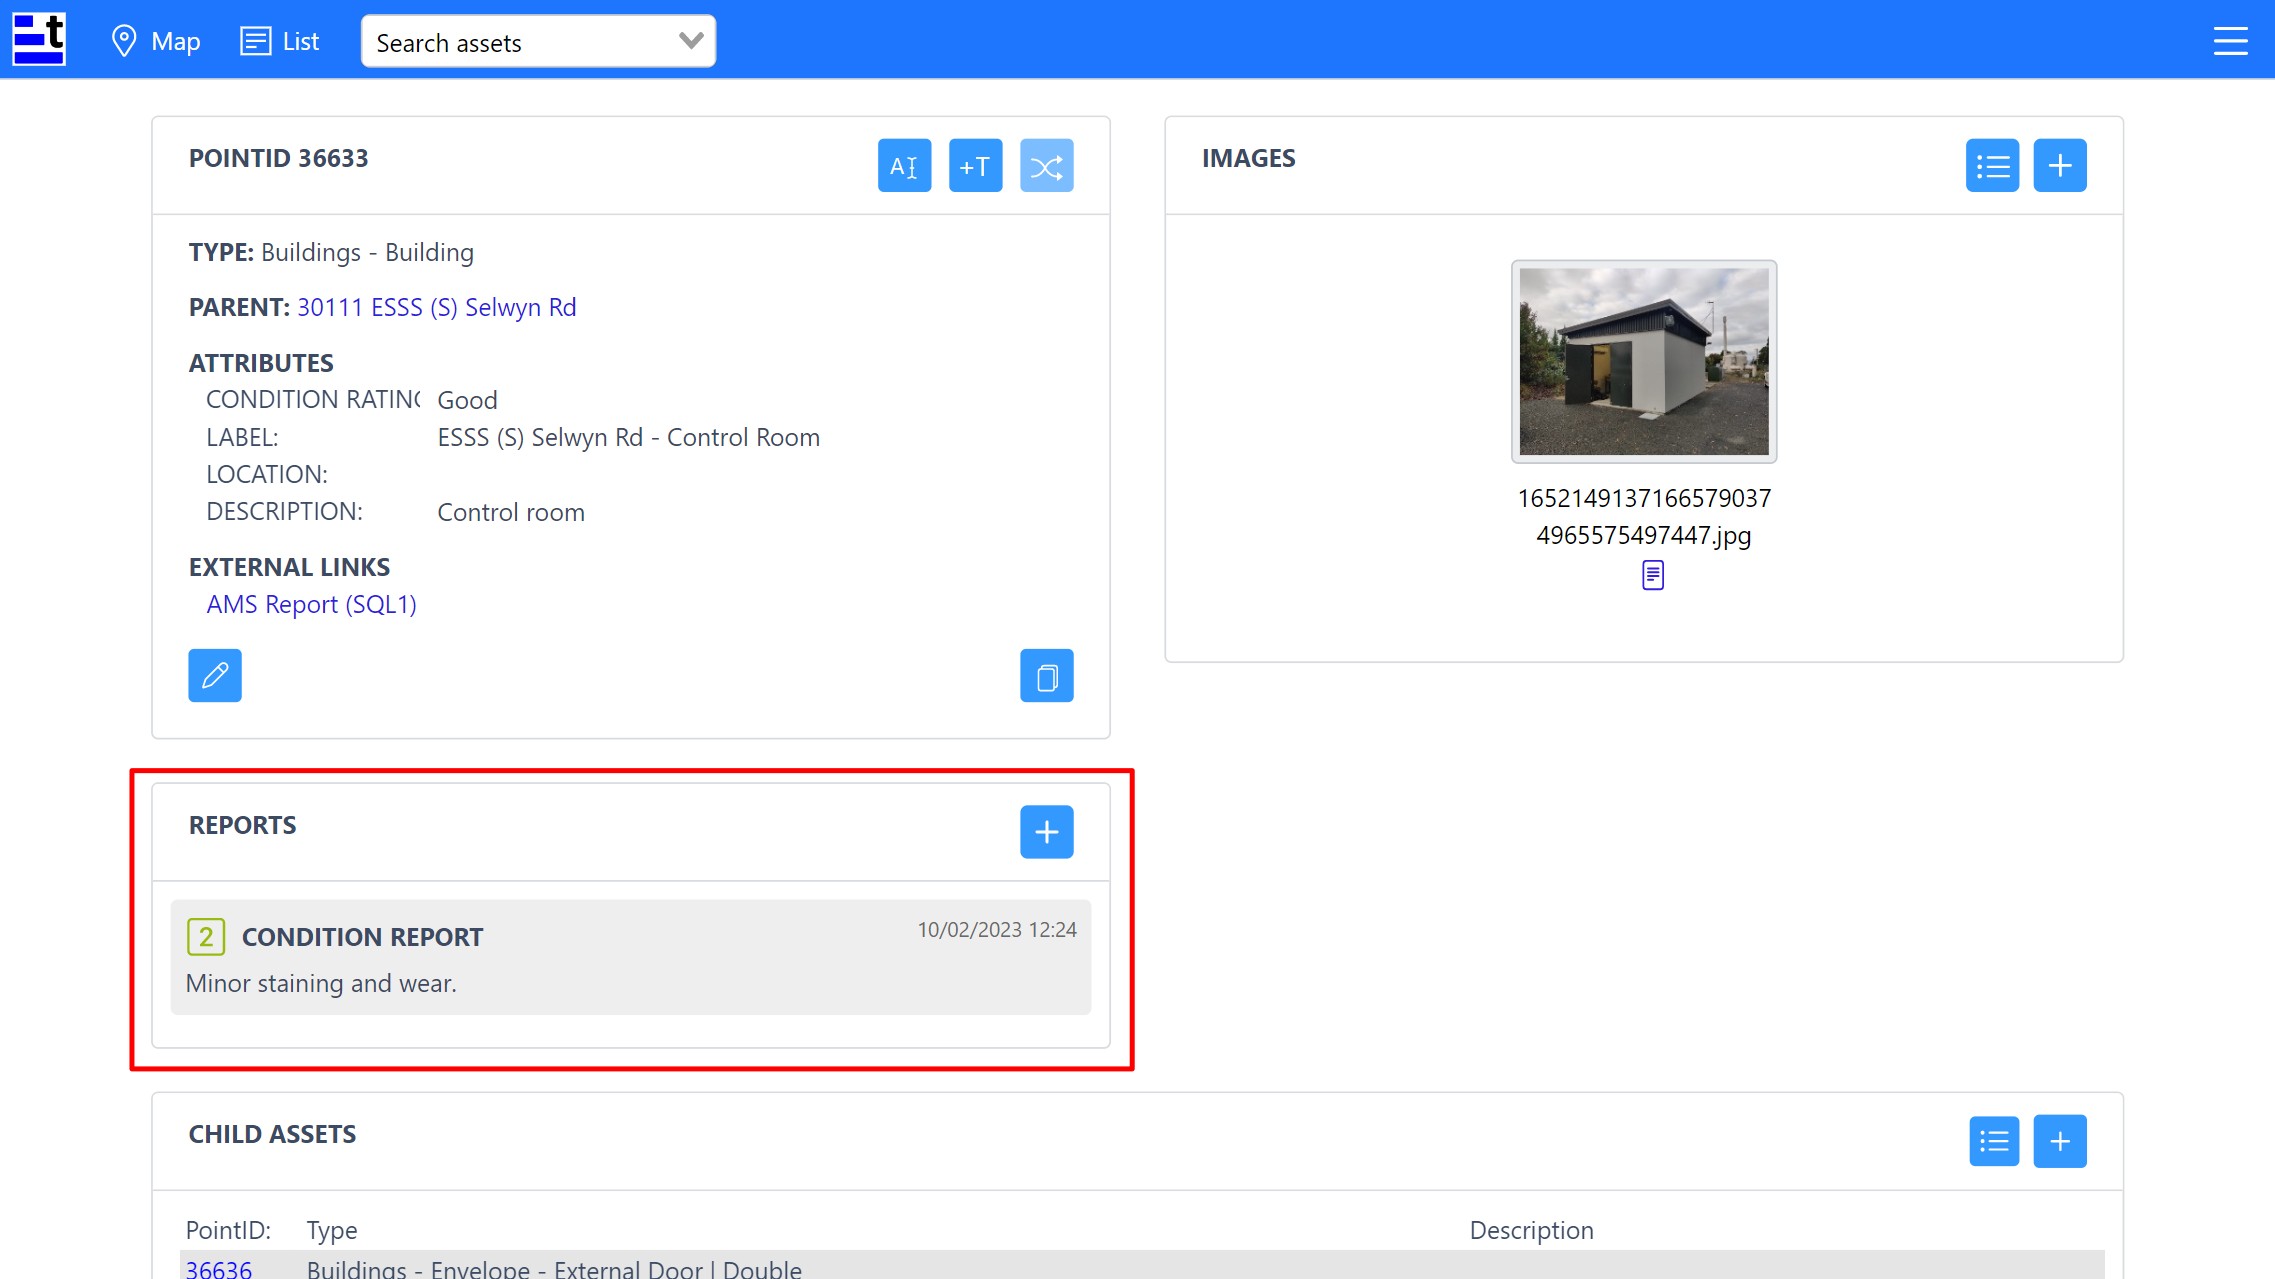
- If there are any existing reports, these will be visible in the Reports tile. There are currently three different types of report.
| Report Type | Description | Example |
|---|---|---|
| Notes | Record any important or useful information about an asset or site | Site check done, all okay |
| Condition Assessment | Keep track of asset condition over time | 1 - Very Good (New or near new condition) |
| Faults | Record urgent repair work or issues that need resolving | Fire extinguisher taken from site, replacement required |
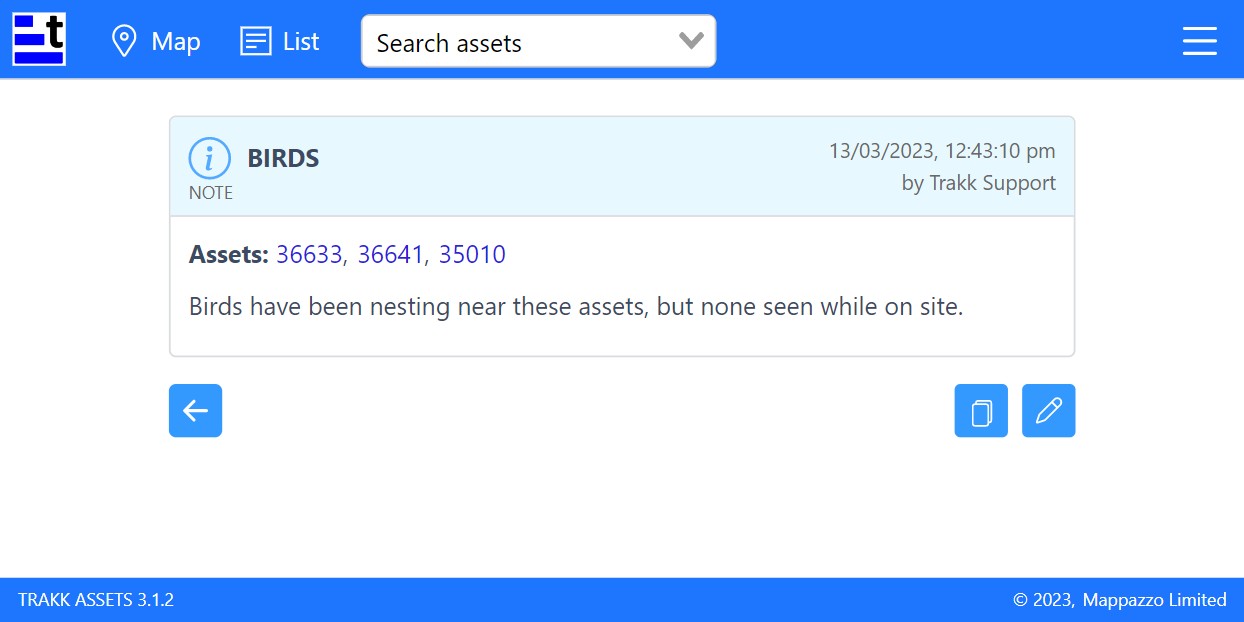
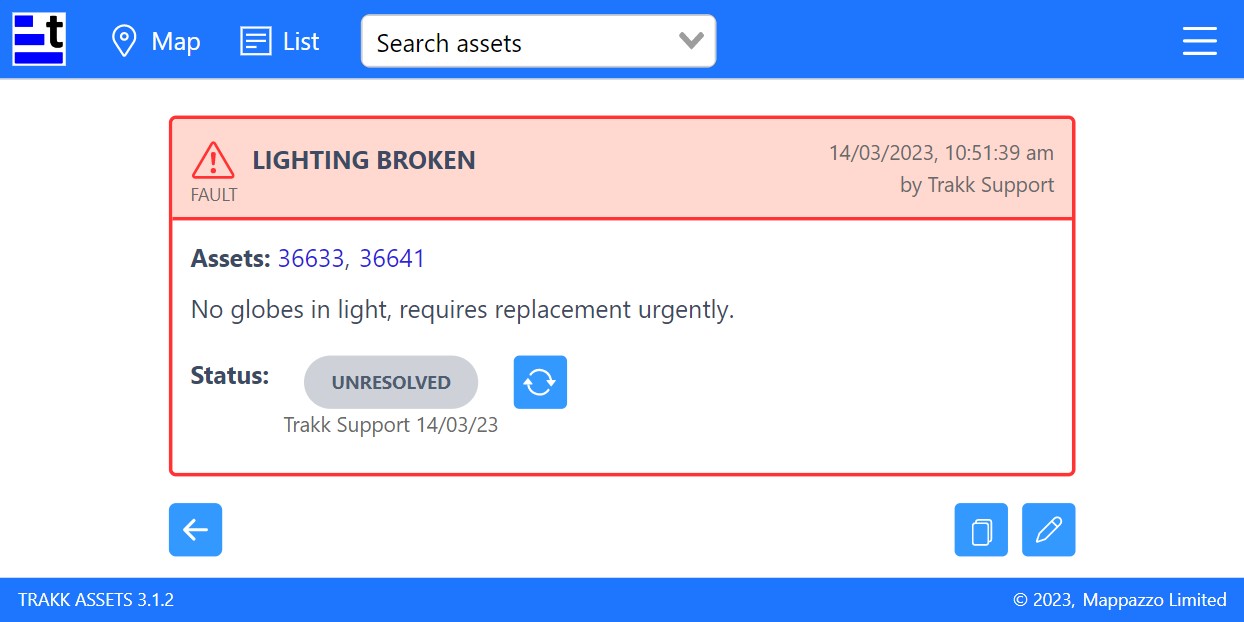
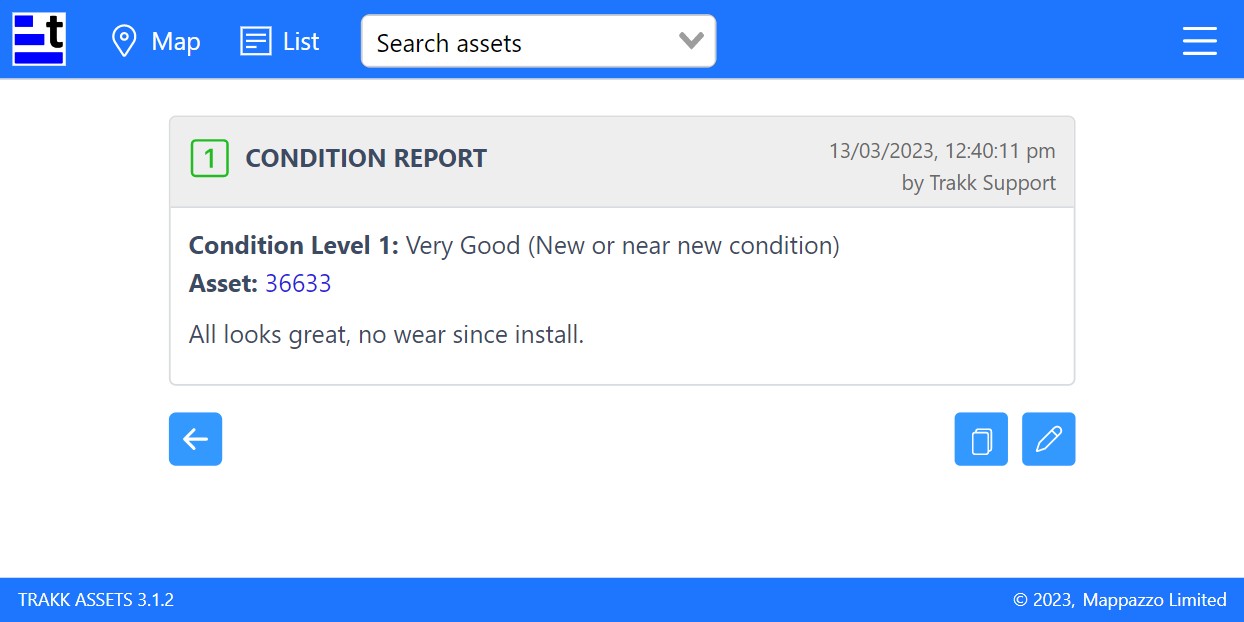
- Click on any report to open it and view the details. Details vary for each type of report (note, fault and condition assessment), refer screenshots below.
- When you have finished viewing a report, click on the back arrow button
 to return to the asset information page.
TIPS
- The asset reports are sorted so that active faults and most recent are at the top of the list.
- If there are many reports, you can expand or contract the reports list using the chevron button at the base of the list.

STEP 3 - Add a new report
- On the asset page, click on the add button in the Reports tile.

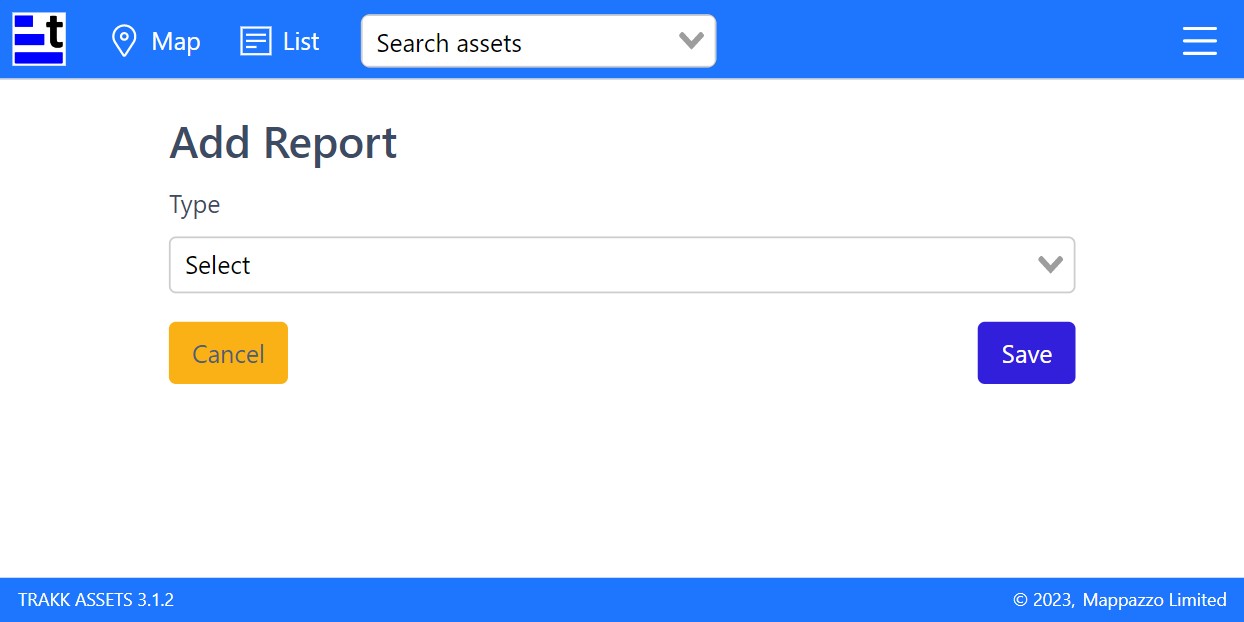
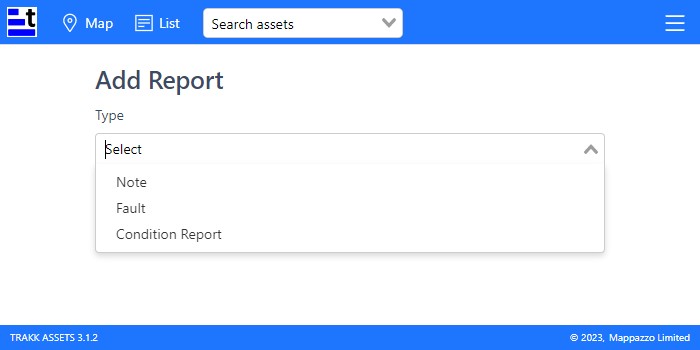
- Select the type of report you want to add using the dropdown menu.
OPTION 1: Note
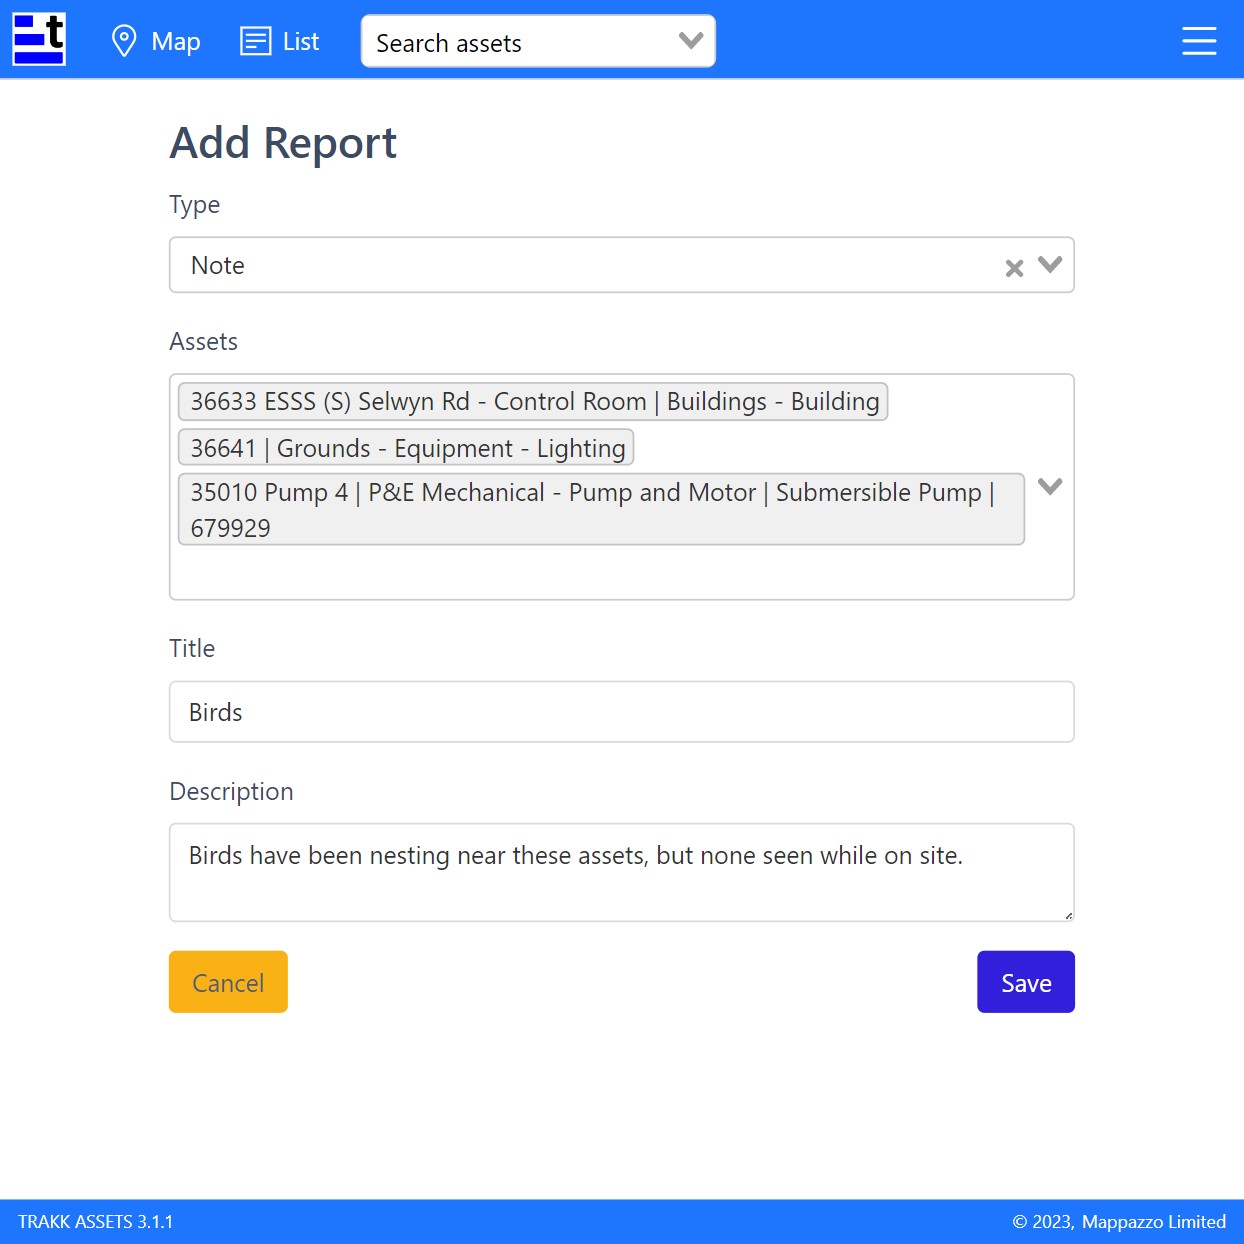
Anyone can add a note. These can be used for recording anything that isn't a fault or condition report; but they could also be used to provide extra information related to those, if desired.
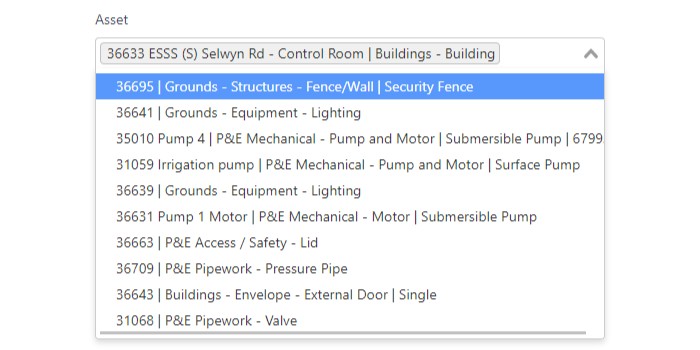
- Click in the dropdown menu to add the asset(s) that the note is about. You can also type in the asset number or name to filter the list if needed. Add more than one asset if the note is about multiple assets.
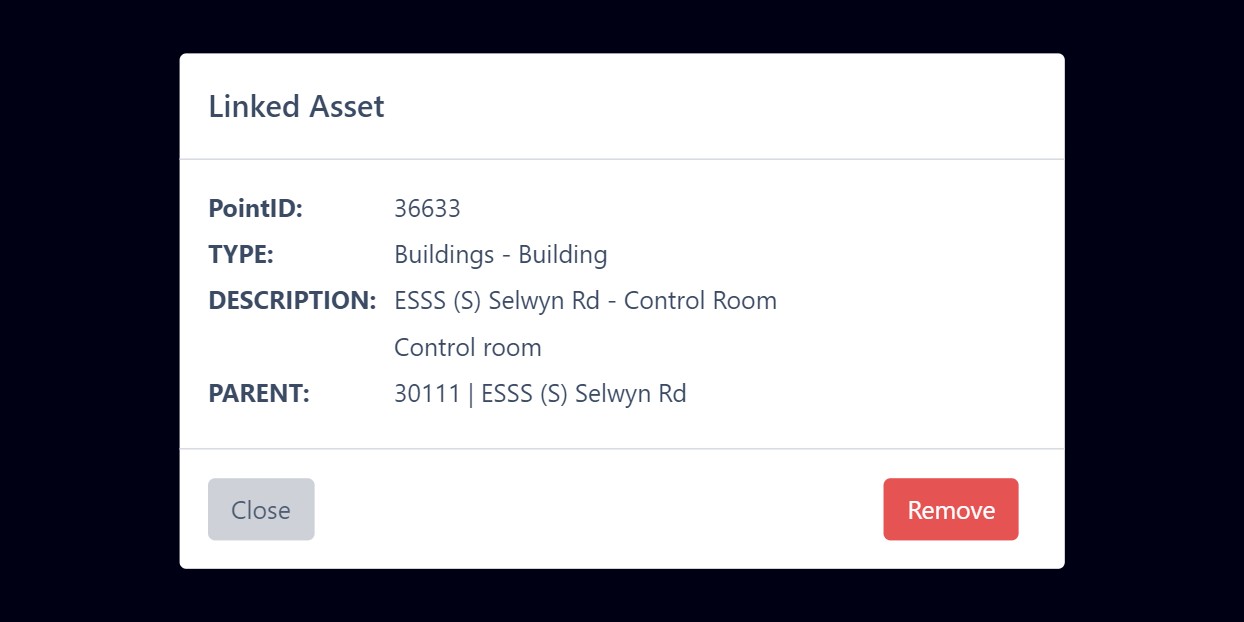
- Clicking on an asset in the list, brings up more information so you can check that the correct asset has been selected. If you need to remove an asset from the list click the remove button, from this pop-up box.
- Type in a Title. This is a brief one or two word summary of the note topic.
The maximum size for the Title is 50 characters. An error will be shown on saving if the title is over this limit.

- Type in a Description. This is the main content of the note.
- Click the Save button to save and return to the asset information page.
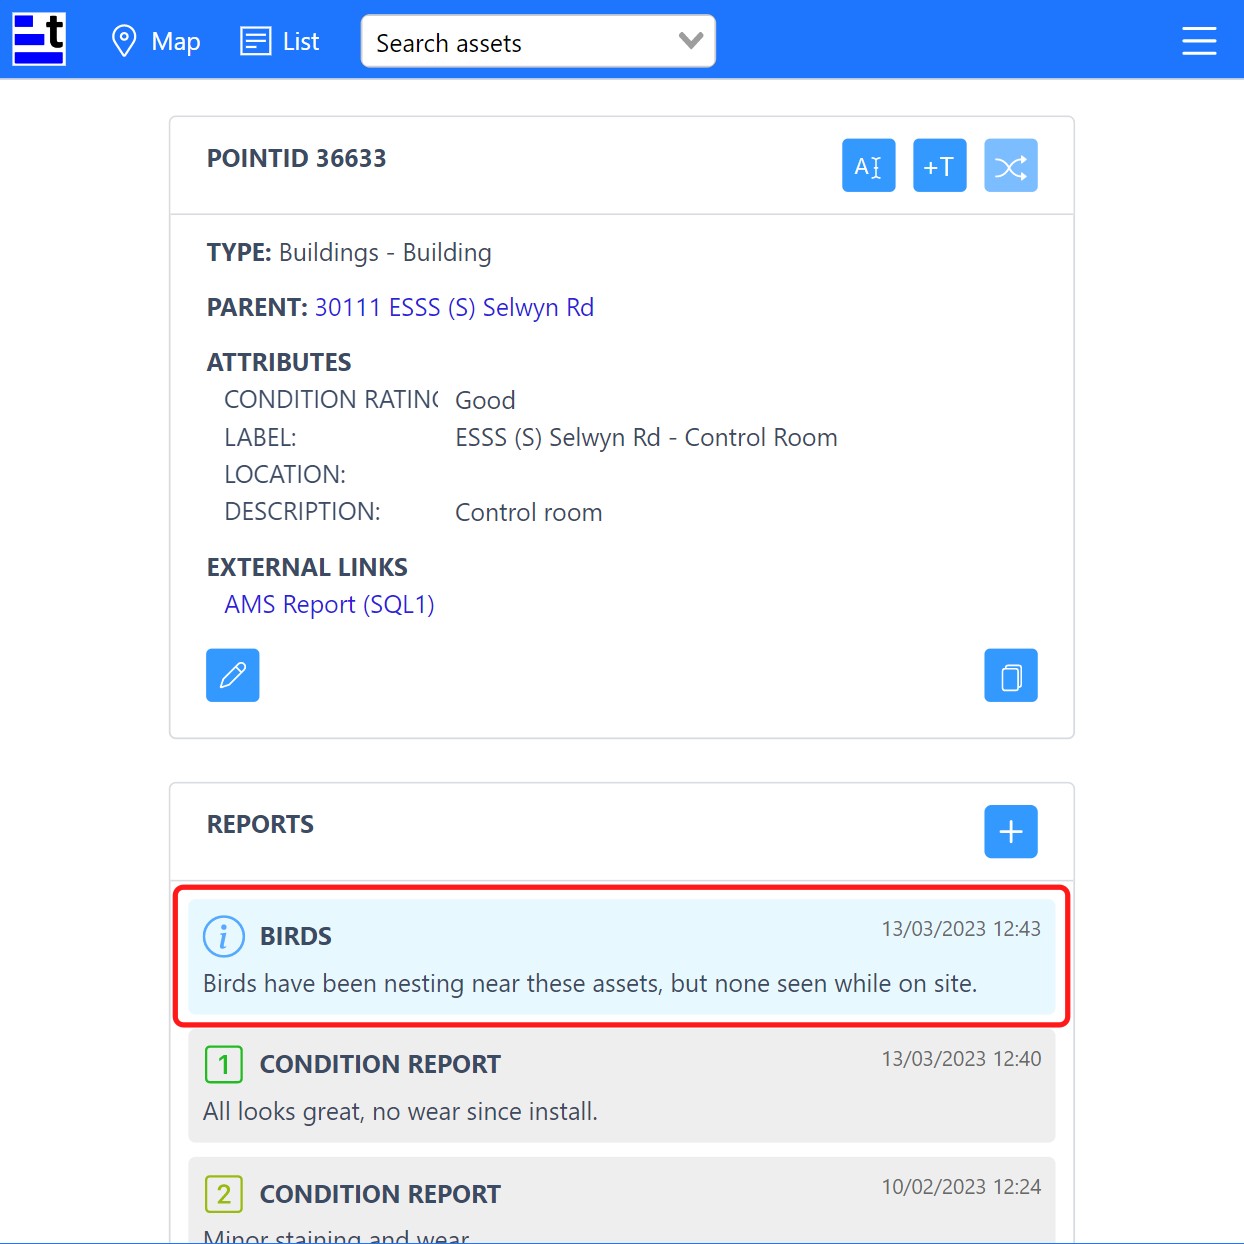
The new note will now be visible in the Reports tile, including the date and time it was created.
Notes are colored blue and have an information icon.
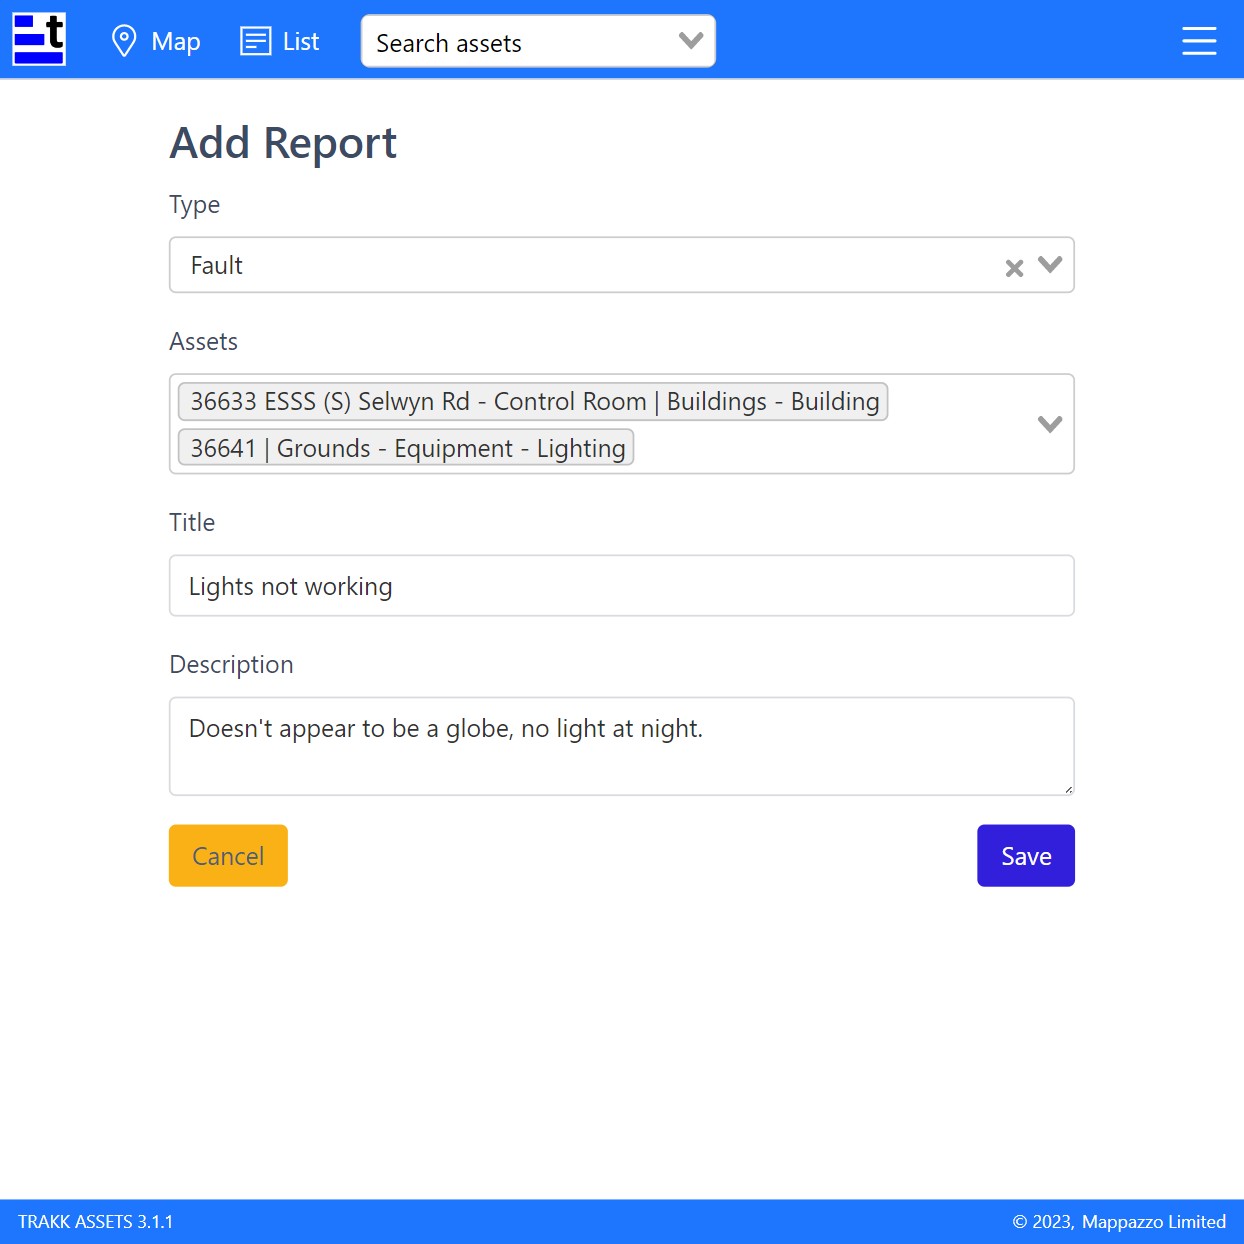
OPTION 2: Fault
- Click in the dropdown menu to add the asset(s) that have a fault. You can also type in the asset number or name to filter the list if needed. Add more than one asset if the fault impacts multiple assets.
- Clicking on an asset in the list, brings up more information so you can check that the correct asset has been selected. If you need to remove an asset from the list click the remove button, from this pop-up box.


- Type in a title. This is a short summary of the fault or issue.
The maximum size for the title is 50 characters. An error will be shown on saving if the title is over this limit.

- Type in a description. This is the main content of the fault and needs to clearly state what needs fixing. Be as detailed as possible.
- Click the Save button to save and return to the asset information page.
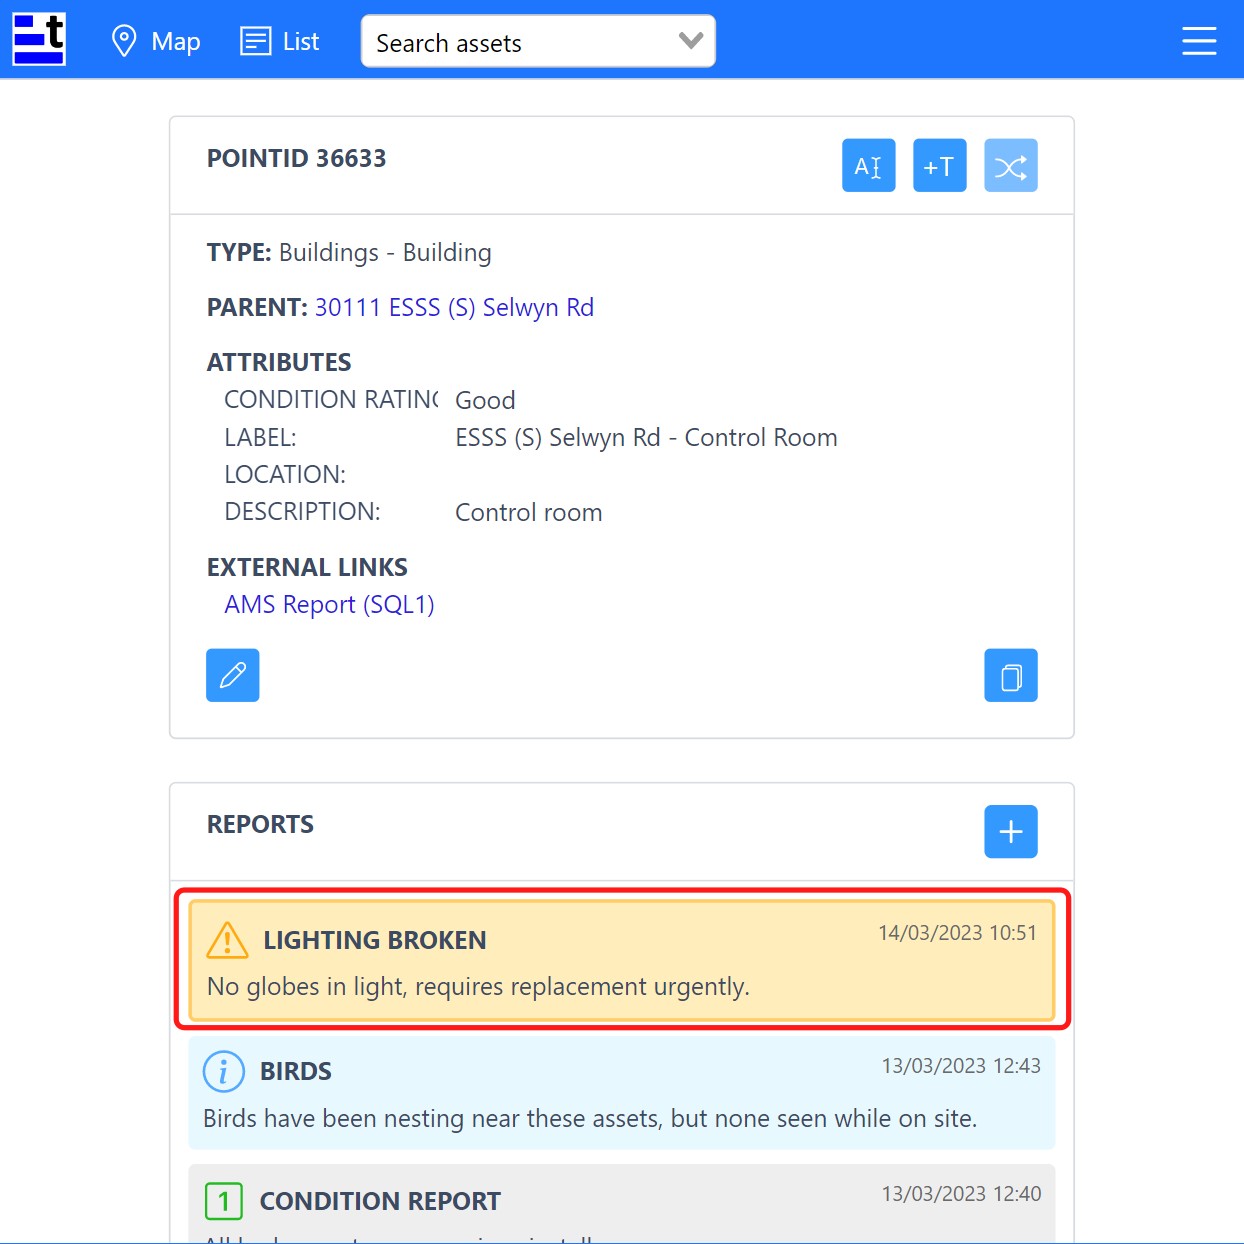
The new fault will now be visible in the Reports tile, including the date and time it was created.
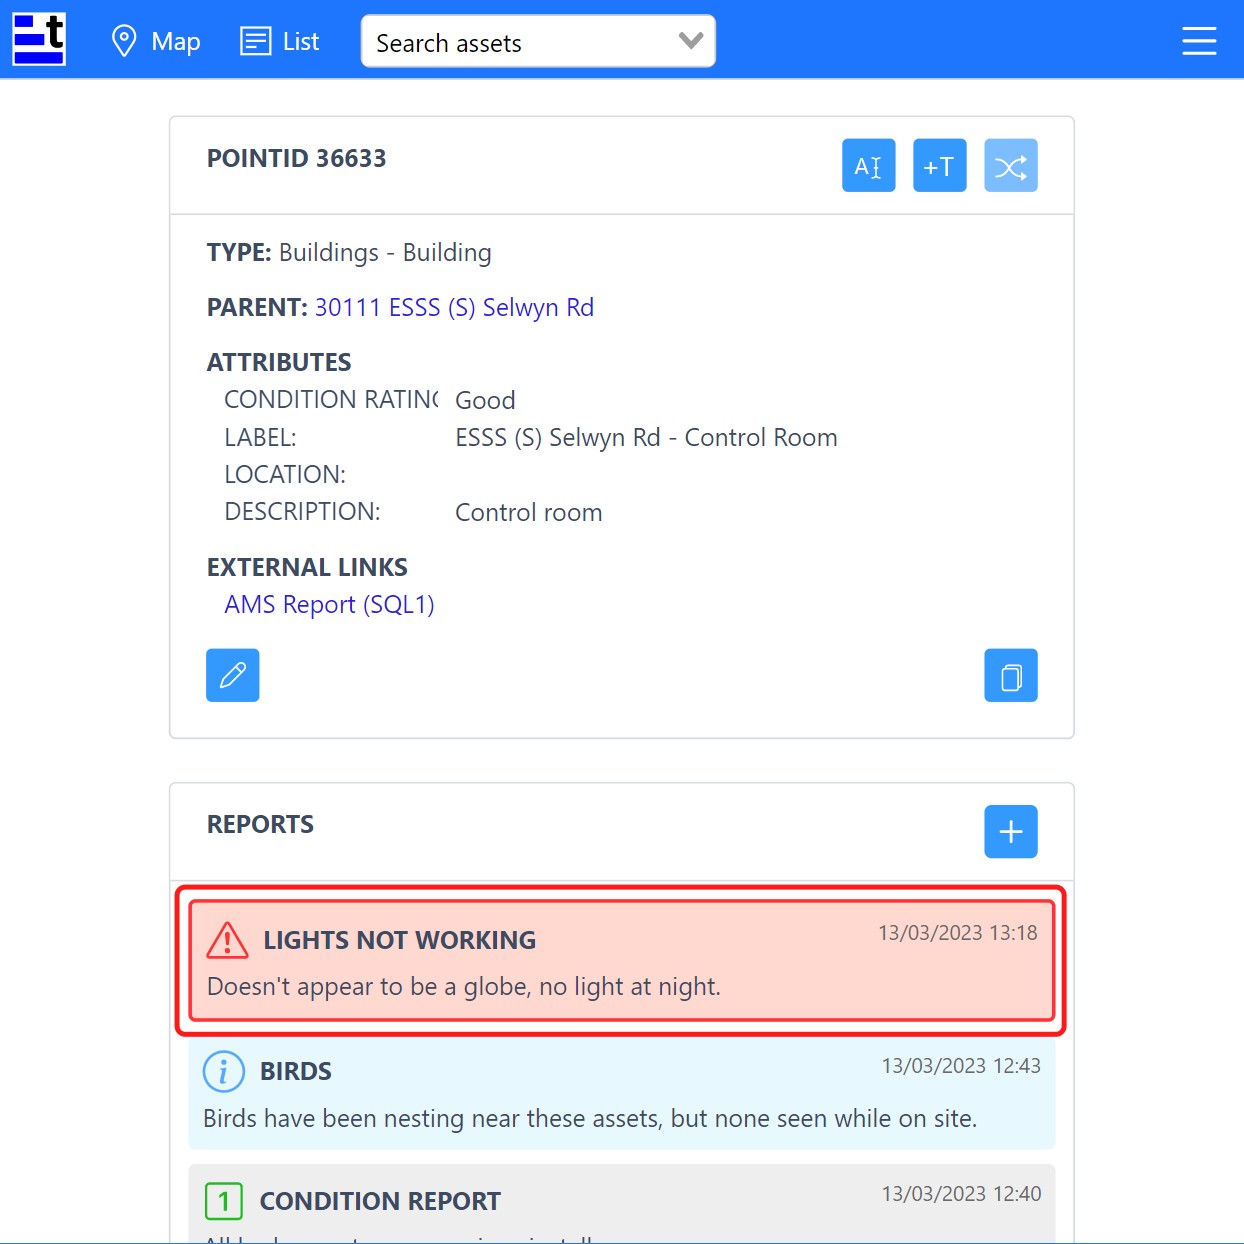
- Your new fault appears in the asset Reports tile and is marked as 'unresolved' when it is created.
- Faults are indicated with an Alert icon and coloured based on their current status
- 'Unresolved' faults are colored red.
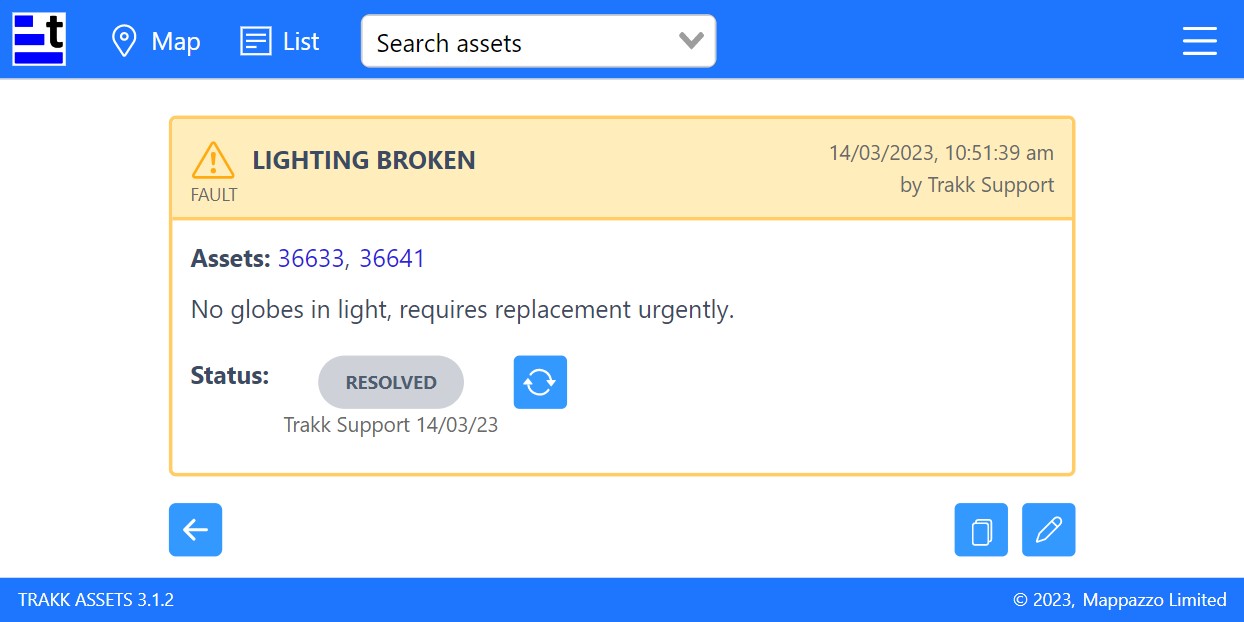
- 'Resolved' faults are colored yellow.
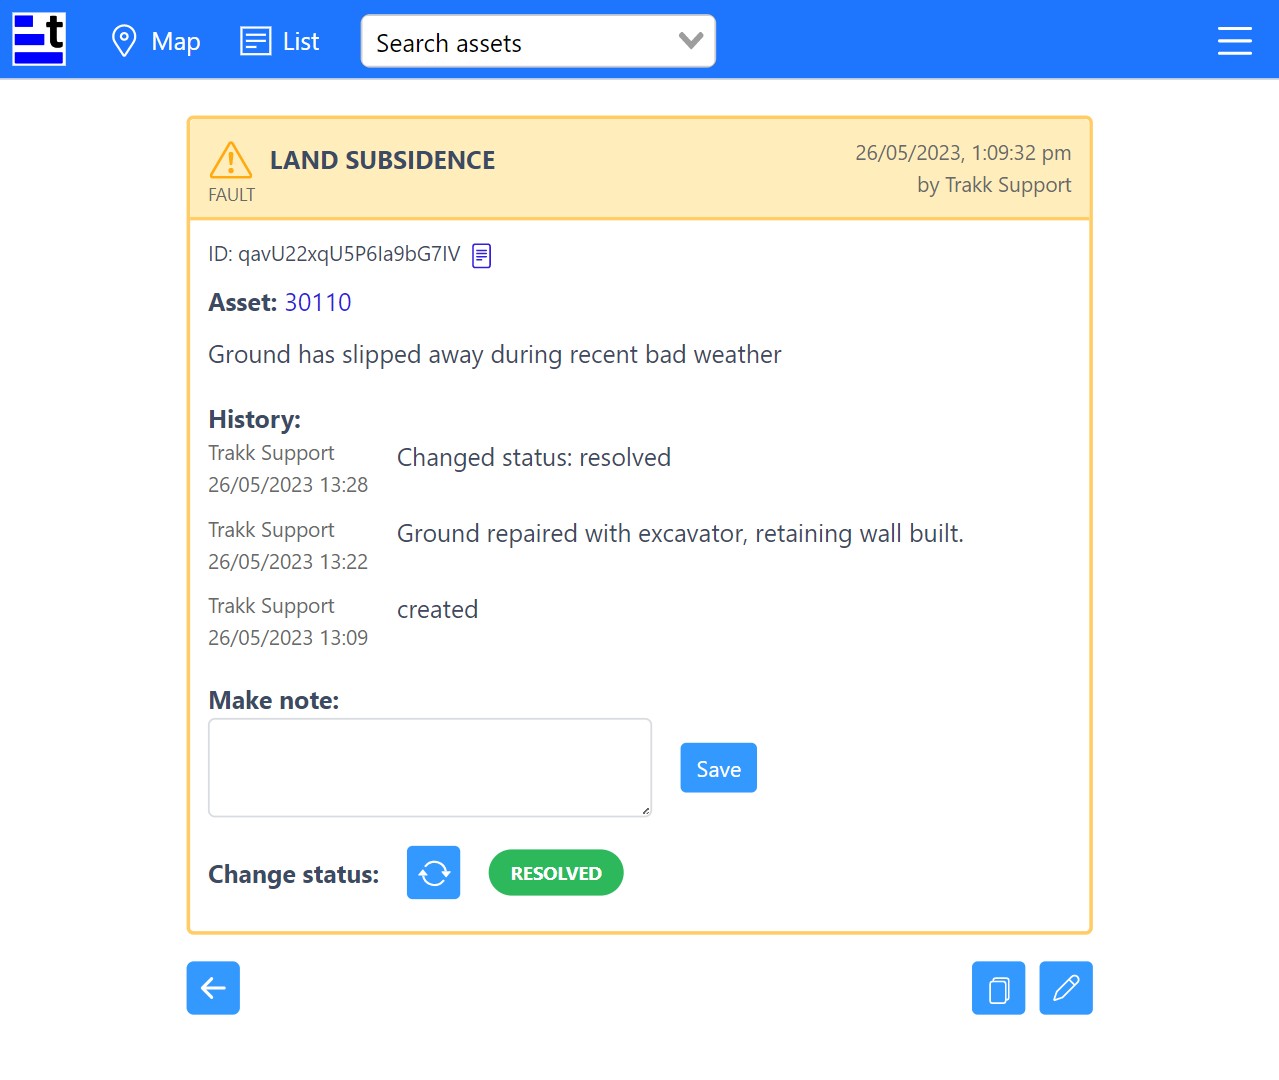
- You can record what was done to repair the fault by making notes. Click on the fault report to open it.
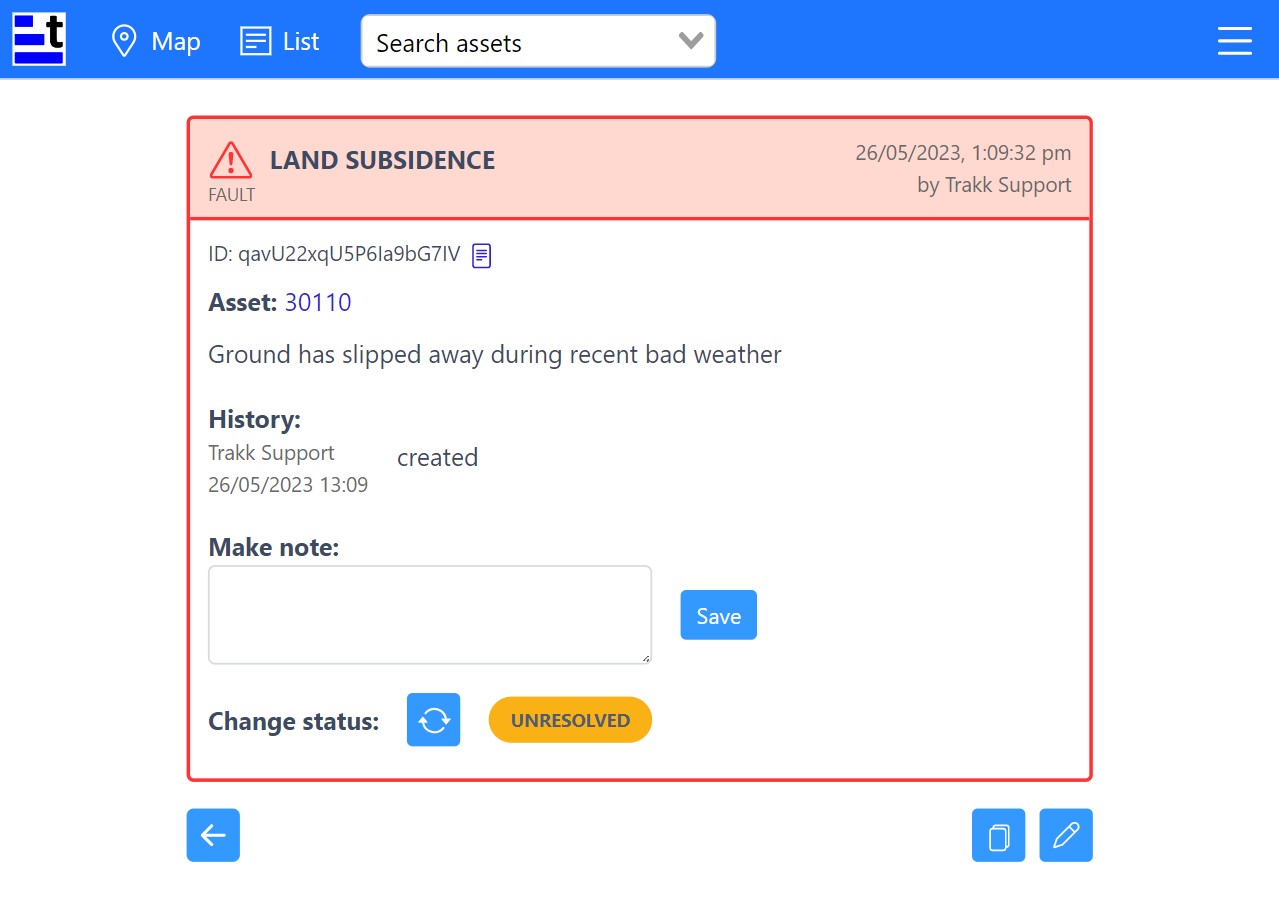
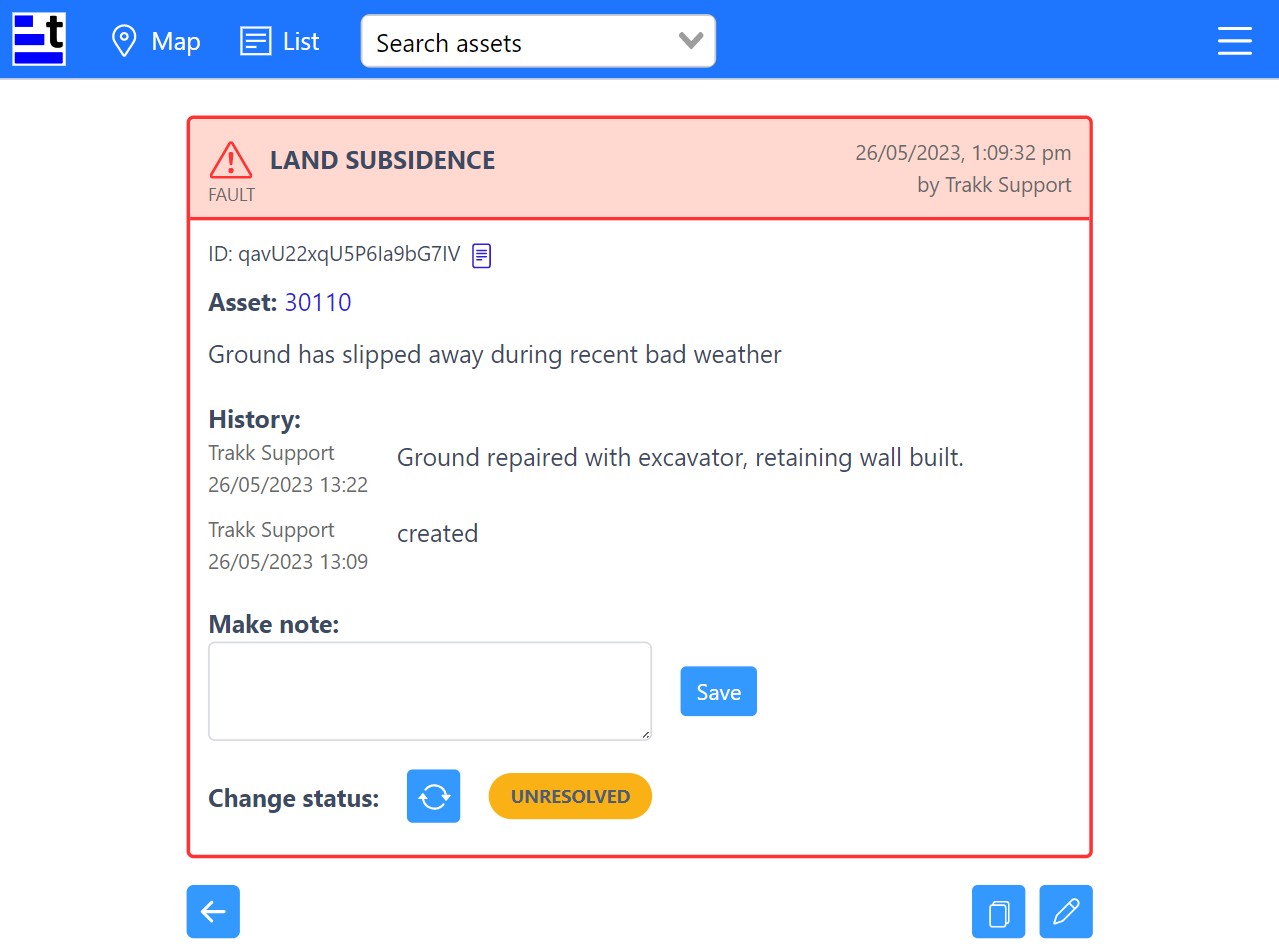
- Once the fault has been remedied, we want to mark it as "resolved". To resolve a fault, click on the resolve button.

- The status of the fault is now resolved, and there is a new note added to the History above.

OPTION 3: Condition Report
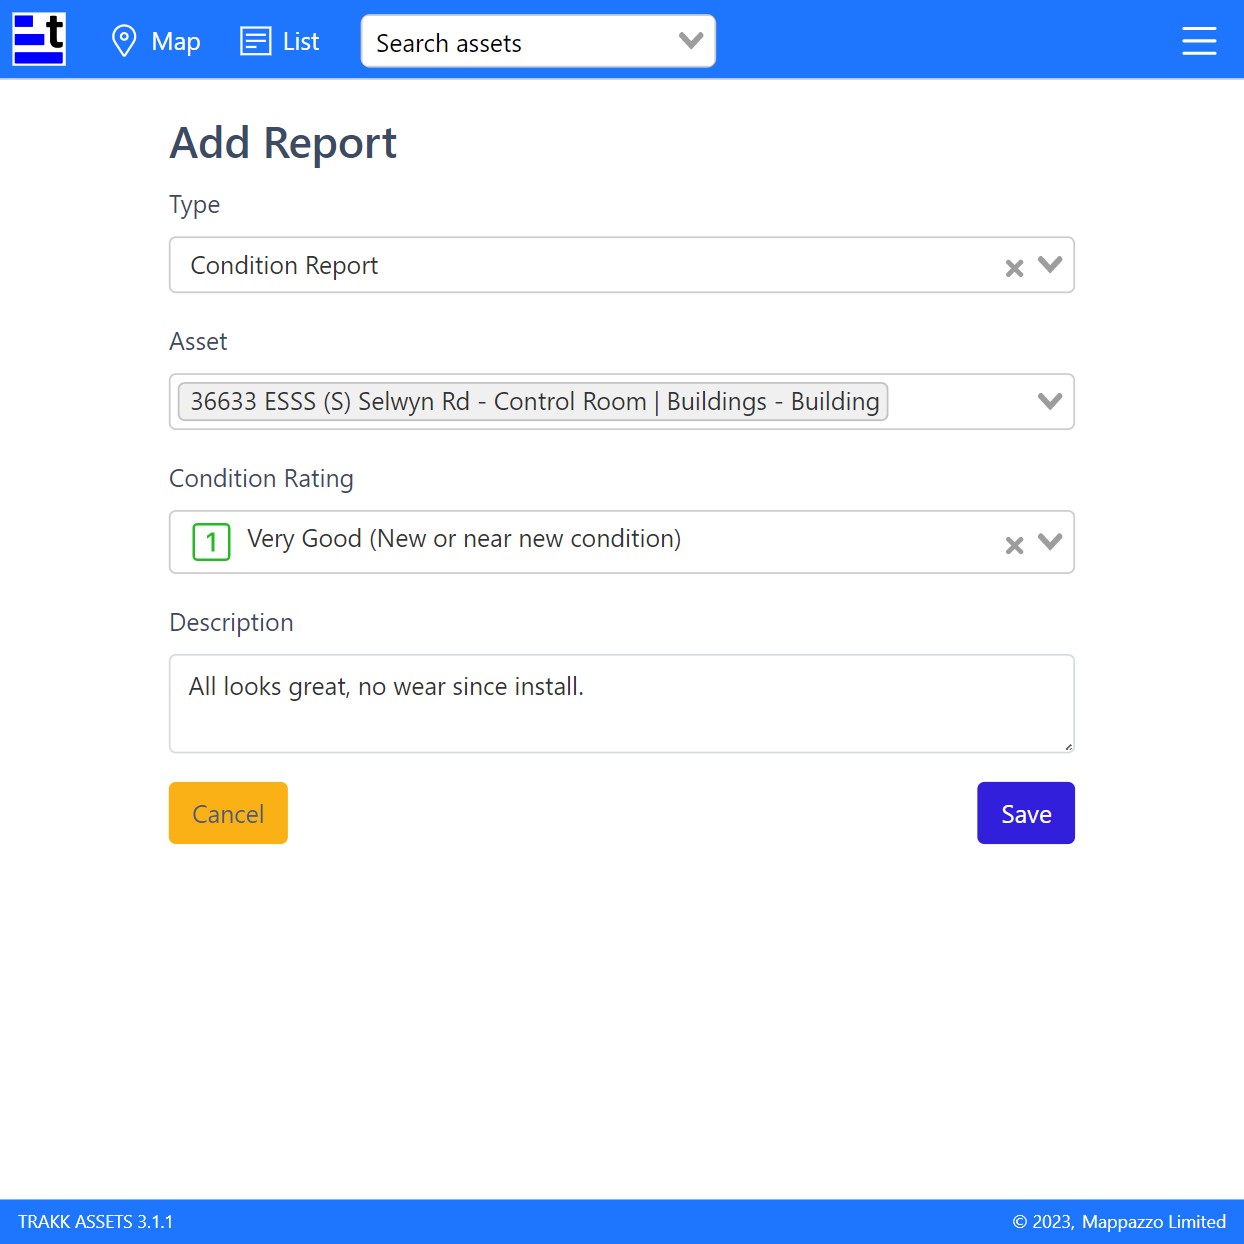
Click in the dropdown menu to add the asset(s) that the condition report is for. You can also type in the asset number or name to filter the list if needed. Only one asset can be selected for a condition report.
Clicking on a selected asset brings up more information so you can check that the correct asset has been selected. If you need to remove an asset click the remove button, from this pop-up box.


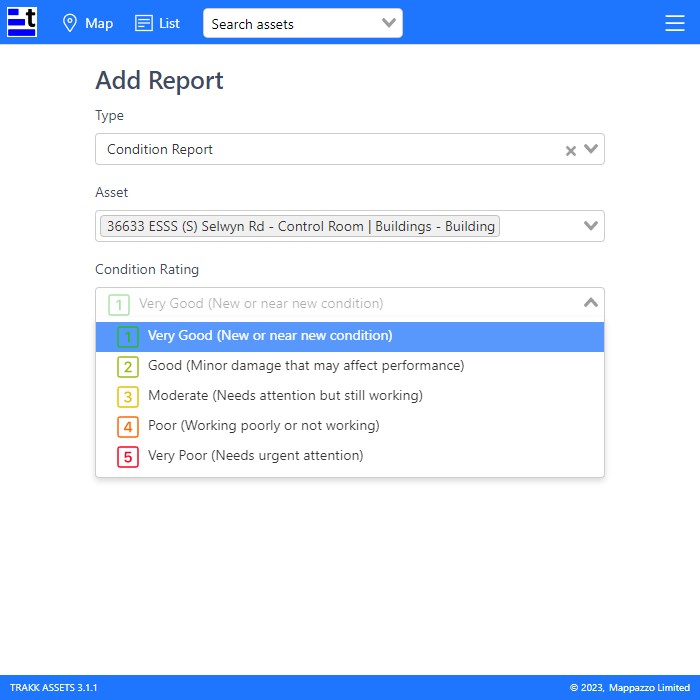
- Choose the condition rating from the list of 1-5, using the criteria as a guide.
If you want to remove or change the rating before you have saved,
just click a new rating from the list or click the x button to remove the current rating.![]()
- Type in a description. This is the place to record what has been done during the condition assessment. Be as detailed as possible.
- Click the Save button to save and return to the asset information page.
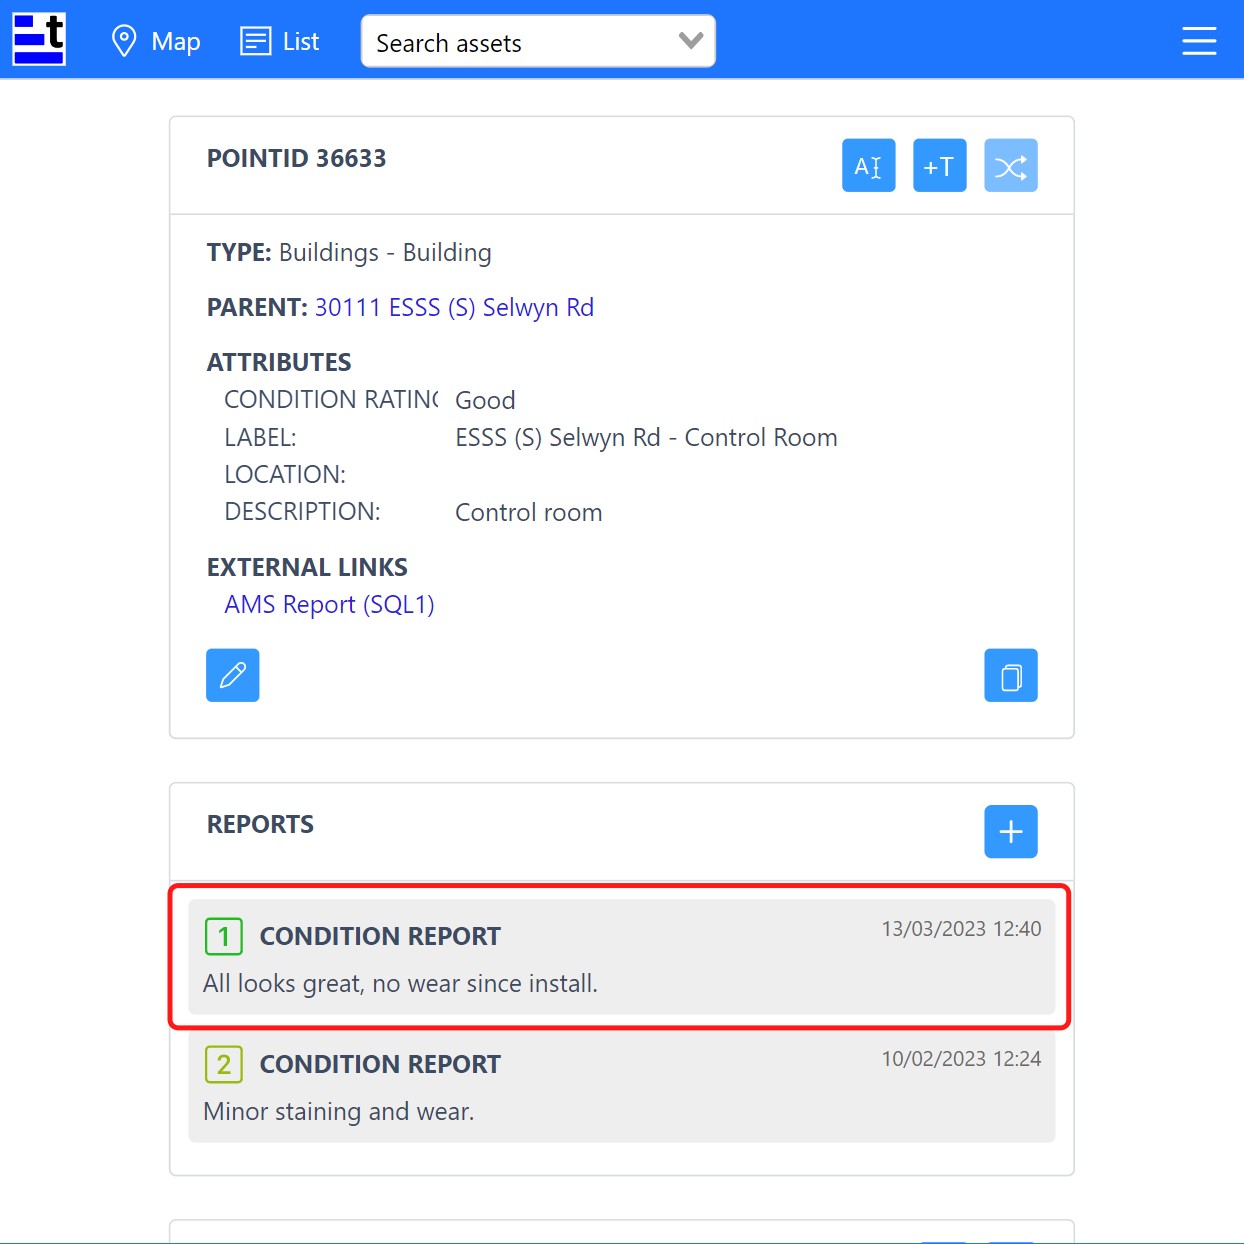
The new condition report will now be visible in the Reports tile, including the date and time it was created.
Condition reports are colored grey and have an colour-coded ratings as an icon.
STEP 4 - Editing reports
Your ability to edit, duplicate, delete reports will depend on your user permissions.
Instead of editing an existing report, consider making a copy so that history is retained.
- To duplicate an existing report, click on the copy button.

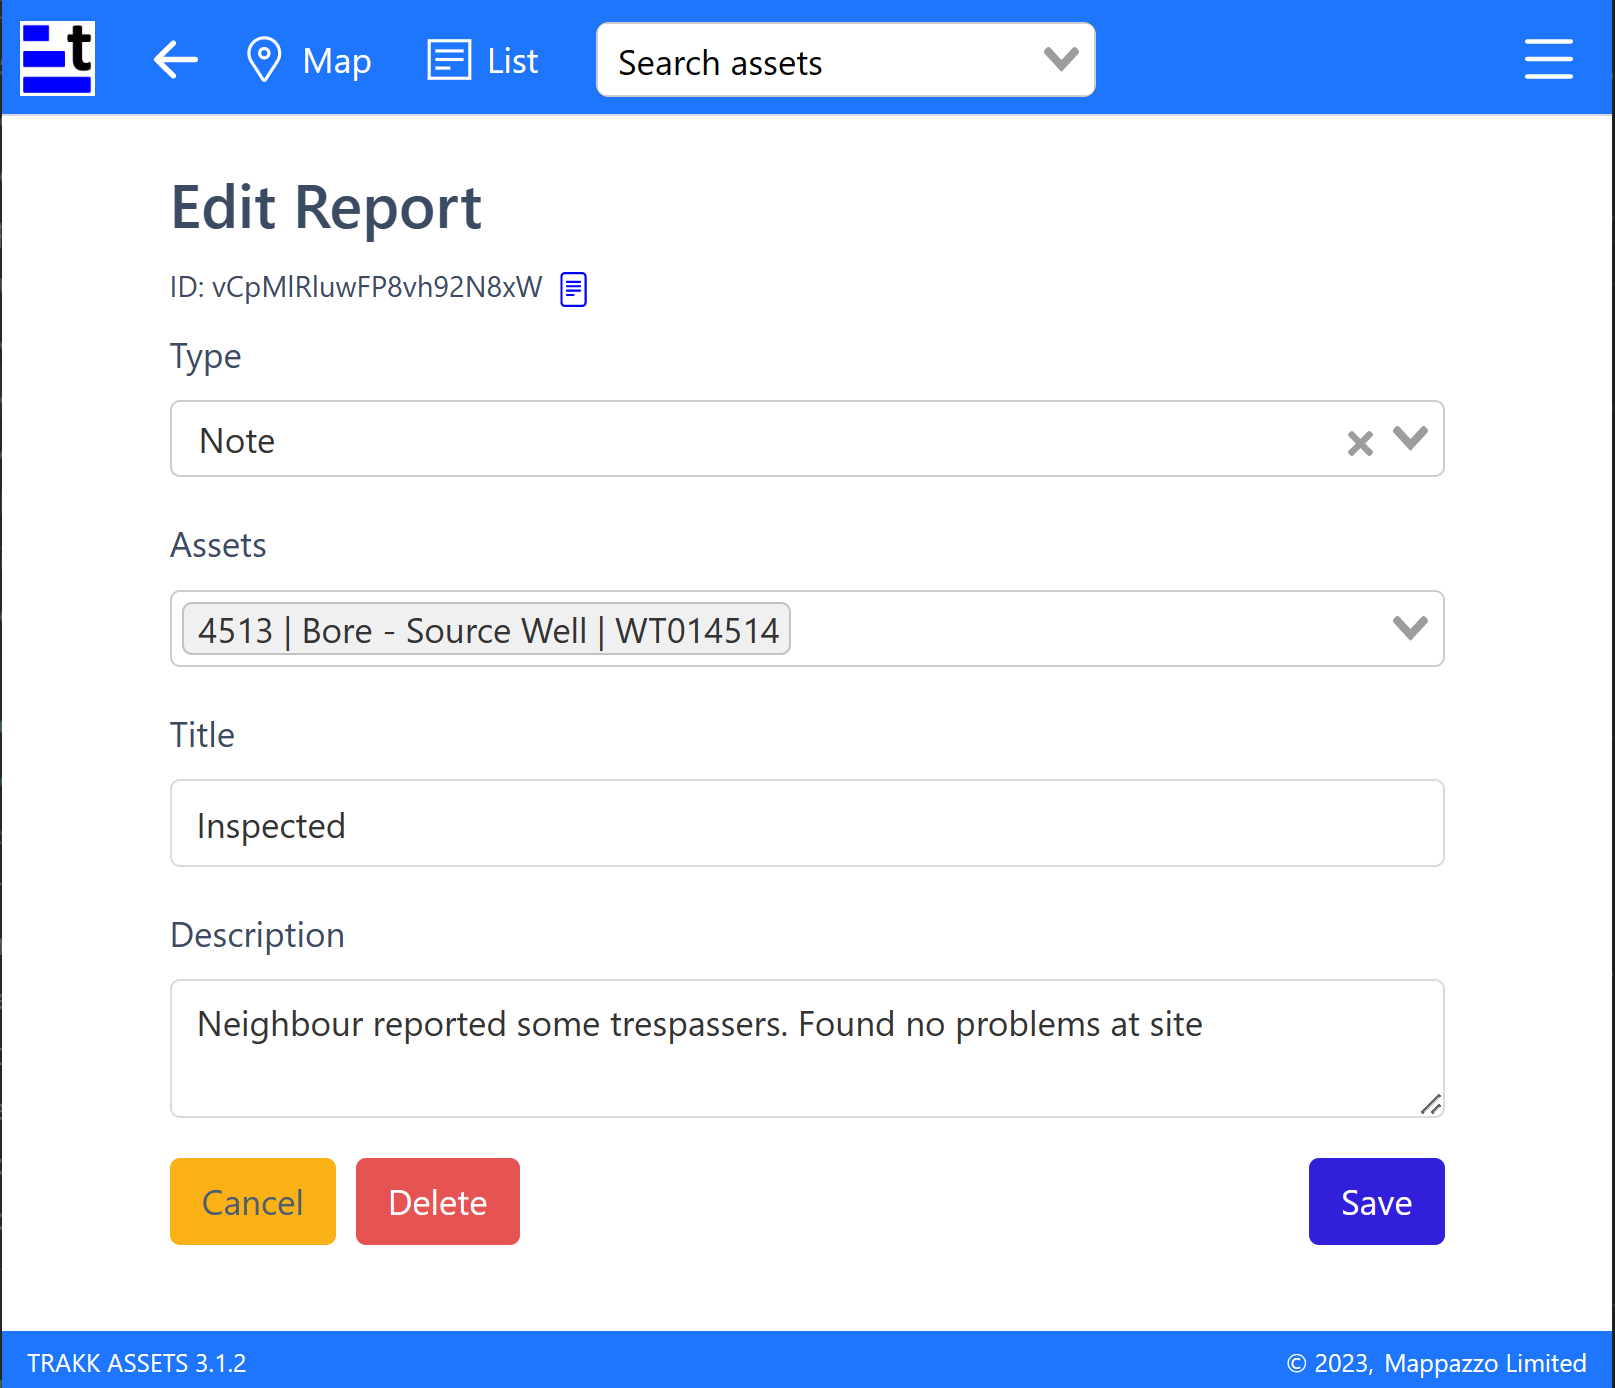
- To edit an existing report, click on the edit button.

- Change any details as needed, then click Save button to save the changes to the report. To discard your changes instead of saving, click the Cancel button.
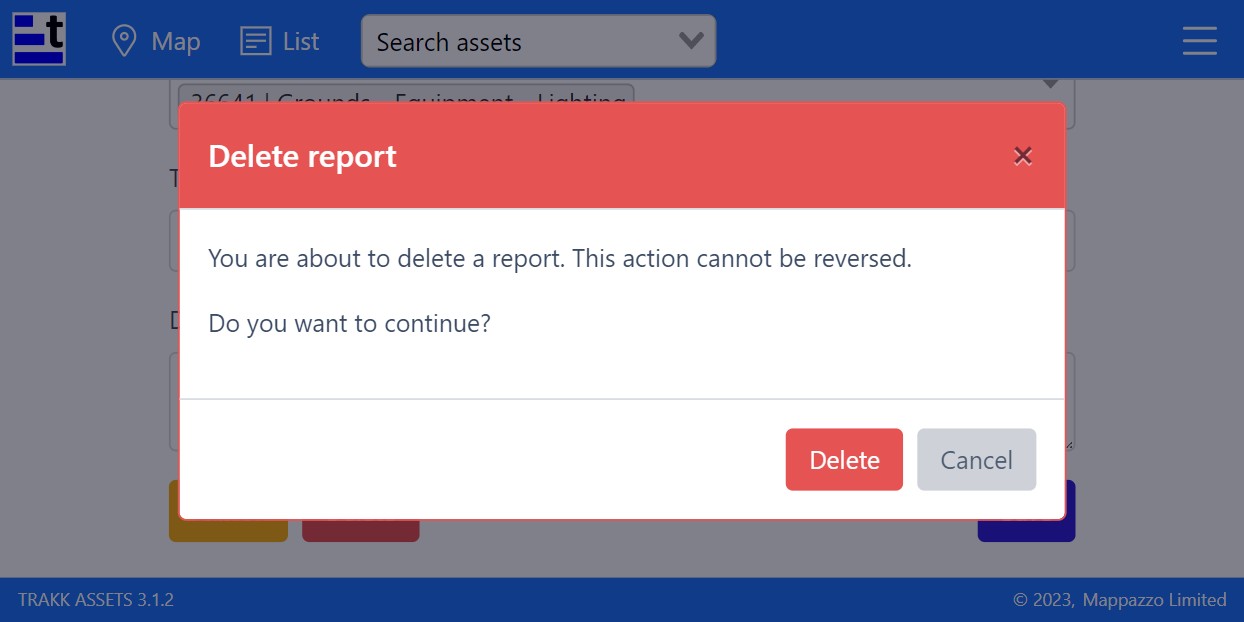
- To Delete the report instead of editing it, click the Delete button.
You will be asked to confirm that you wish to delete the report. - Click Delete button to delete the report, or Cancel if you change your mind. Deleting will permanently remove the report from the asset reports list.
