Basic Navigation
This quick guide will show you how to navigate Trakk Assets to make using it easy and pleasant.
The app can be used on both a mobile device or computer.
| Mobile | Computer |
|---|---|
| Tap | Click |
| Swipe | Scroll |
| Zoom (pinch) | Zoom (scroll/click) |
| - | Hover |
When following this guide, simply swap the actions from this table to suit the device you are using.
STEP 1 - Log in
To use the Trakk App, you must be setup as a user. Please contact an administrator if you need to register.
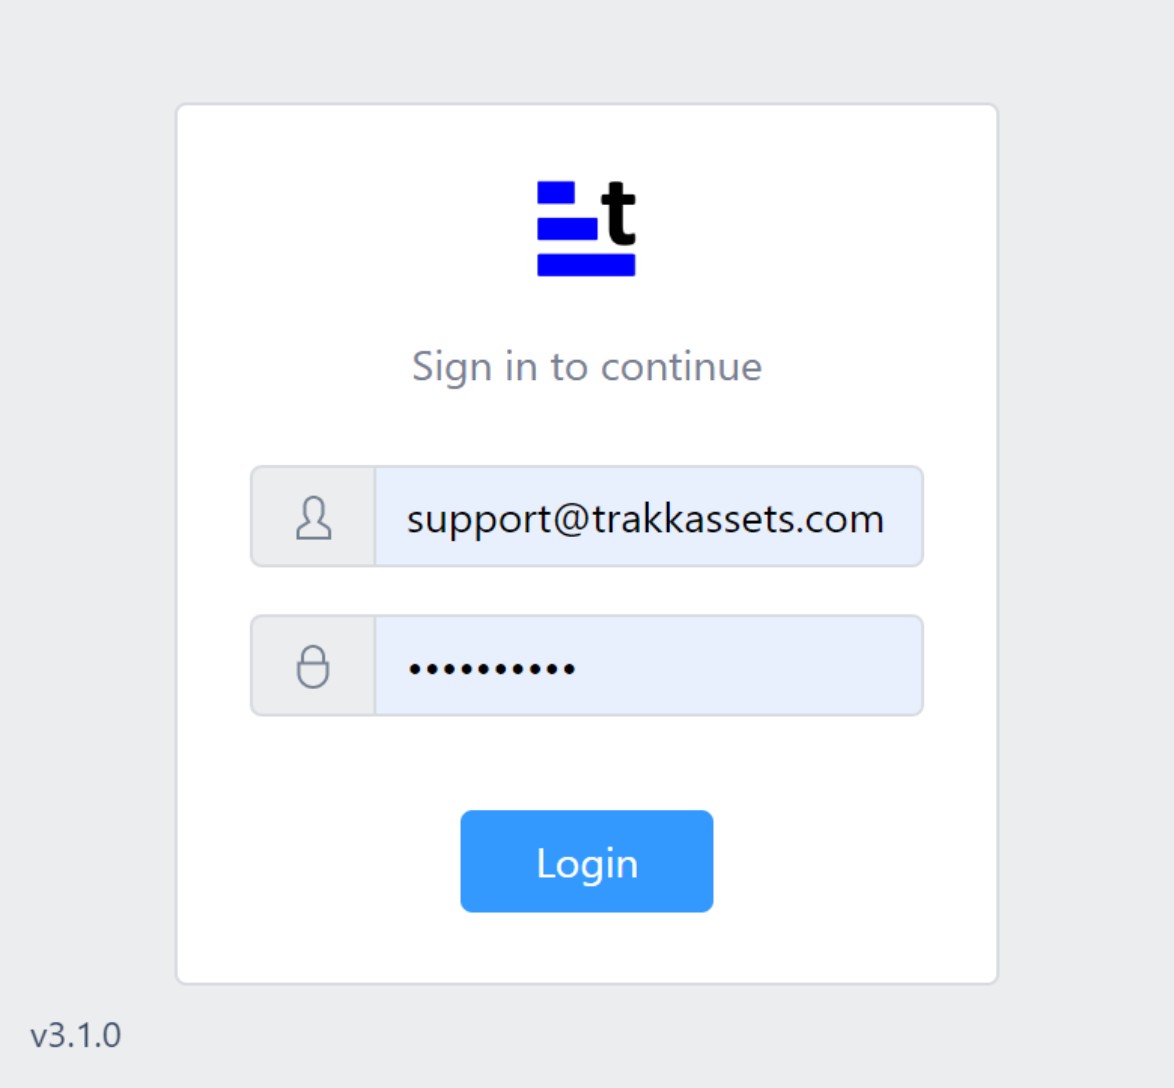
- Enter the email address used to register with Trakk Assets.
- Enter your unique password.
- Click the 'Login' button.

The current version of the app can be seen in the bottom left corner of the screen.

STEP 2 - Map view
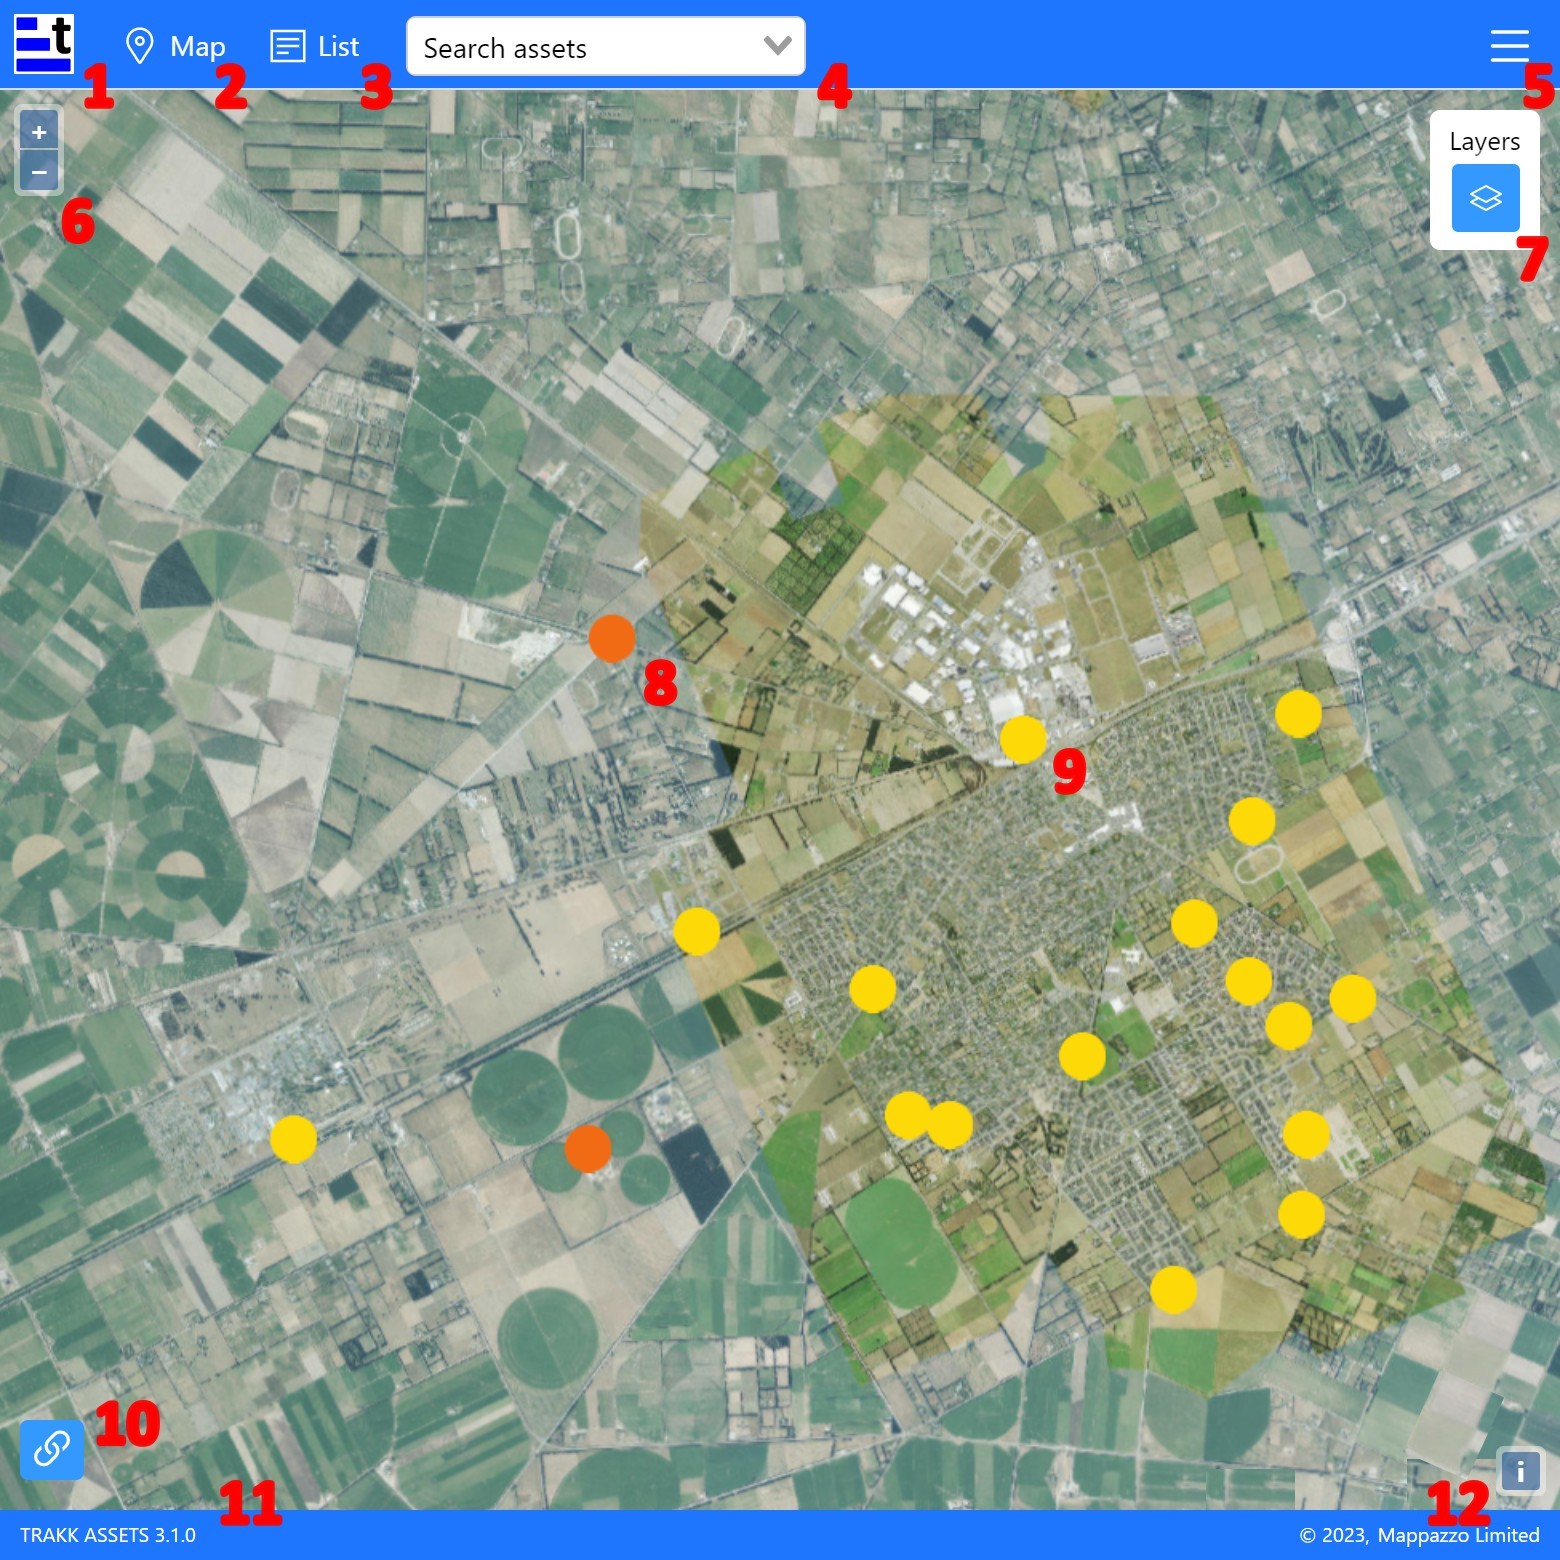
If you have used the app before, the map will open to show the last location you were looking at.
There are several helpful features on this page:

| Ref | Icon | Action / Feature |
|---|---|---|
| 1 |  | Trakk logo - opens the Trakk Assets home page in a new tab. |
| 2 |  | Map view - switches the page view to the aerial map (default view) of current assets. |
| 3 |  | List view - switches the page view to show a list of current assets in a table. |
| 4 |  | Search assets box - type into this box to find specific assets. Results are shown in a list under the search box as you type. |
| 5 | Support menu - click to see additional setup options. | |
| 6 |  | Zoom buttons - click to zoom in and out while on the map view. |
| 7 | Map Layers - click to select different map layers, such as street maps, to show on the map view. | |
| 8, 9 | Asset icons - shows asset location on the map, click for a pop-up window of asset name and Point ID. (The colours and icon shapes may differ, depending on your setup) | |
| 10 | Edit links button - opens a menu for adding/editing/moving/deleting images, assets, and notes. | |
| 11 |  | Software version - shows which version of Trakk Assets software you are currently using. |
| 12 |  | Map attribution - click to expand the icon and view map attribution detail. |
STEP 3 - List view
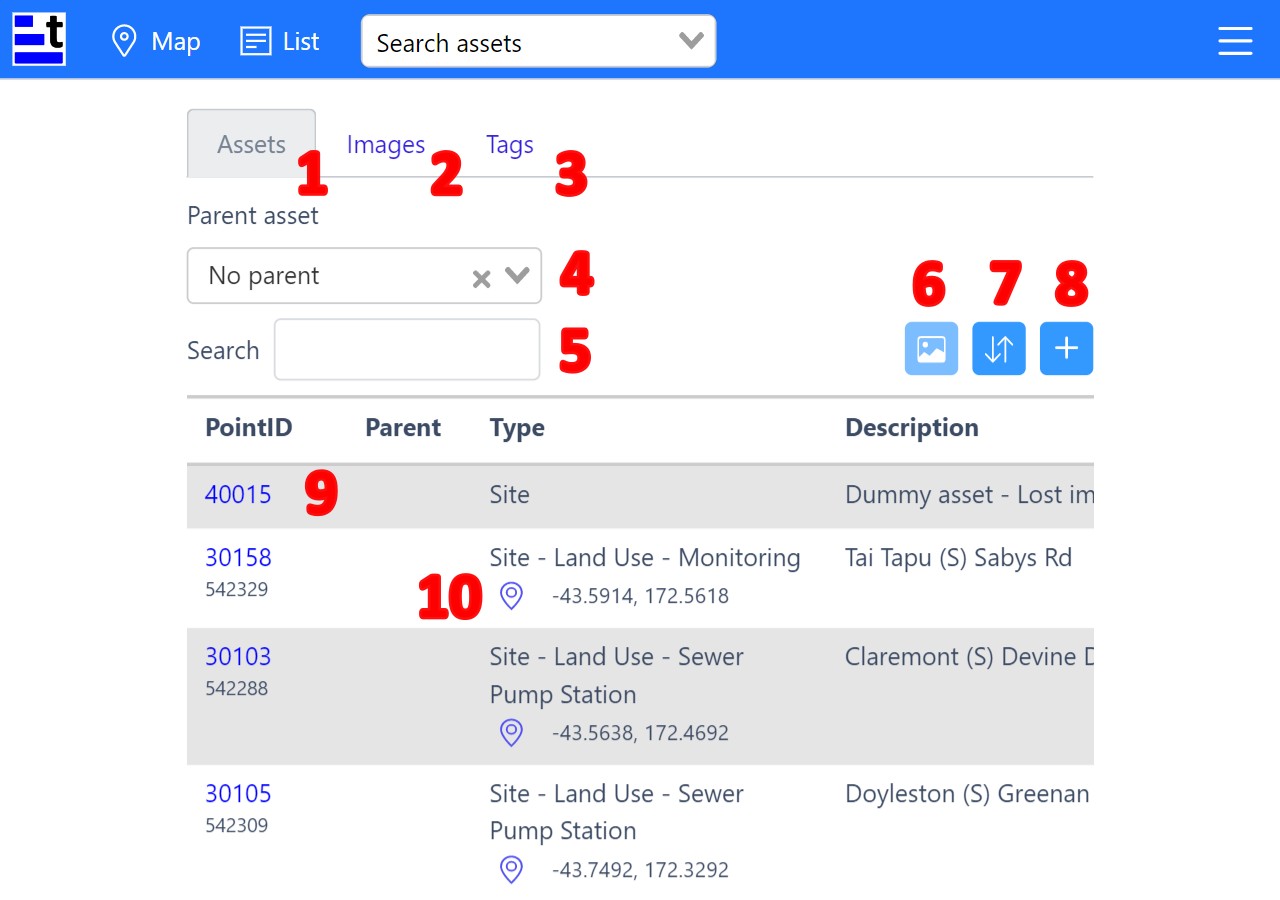
The list view shows a table of the assets and some short details. This includes the Point ID, child/parent asset, the type of asset, and a short description.
Useful features on this page are:

| Ref | Icon | Action / Feature |
|---|---|---|
| 1 |  | Assets tab - a searchable view of the assets in a table (default view). The assets shown in the table are filtered by the chosen parent asset. |
| 2 |  | Images tab - a searchable list of any images linked to the assets in the table. |
| 3 |  | Tags tab - a searchable list of tags (NFC) linked to the assets in the table. |
| 4 | Parent asset menu - lets you choose a parent asset to filter the list by. Click on the dropdown or start typing in the box to search. The table is then filtered based on the chosen parent asset. "No parent" is the default option. | |
| 5 | Search box - type in here to search the table for specific assets. This search field will look in the Point ID, Type and Description fields for results that match what you have typed. | |
| 6 | Image thumbnail button - click this on/off to show/hide the image thumbnails for each asset. | |
| 7 | Export button - click to choose information to export, from what is shown in the assets table. | |
| 8 | Add asset button - click this to add a new asset. | |
| 9 |  | Point ID link - click to open the Asset Details window, which shows more information about the asset. |
| 10 | Map link - this will take you to the map view, centred on this asset's location. |
Up to 50 assets are shown in the list by default. If you scroll to the bottom of the page there are the following options:

| Ref | Icon | Action / Feature |
|---|---|---|
| 11 | Show more button - click to see 50 more assets in the list. | |
| 12 | Show all button - click to show all assets in the list at once. |
